
Hi Gang!
I'm so happy to share with you a canvas I made with my daughter's photo.
I decided to go for a colorful palette as she is a kid and I wanted a bright and joyful result.

Basic Process
So join me in the Step by Step process:

All products are set so let's Start:
 First step was coloring in the areas of the canvas where the photo and embellishments will sit.
I used five gorgeous sprays: Rizzo's Rowdy Red Flat, Grab a Guy Gold Shimmer, Jack in the Pulpit Teal Shimmer, Time Travel Teal Shimmer and Cowabunga Copper Shimmer.
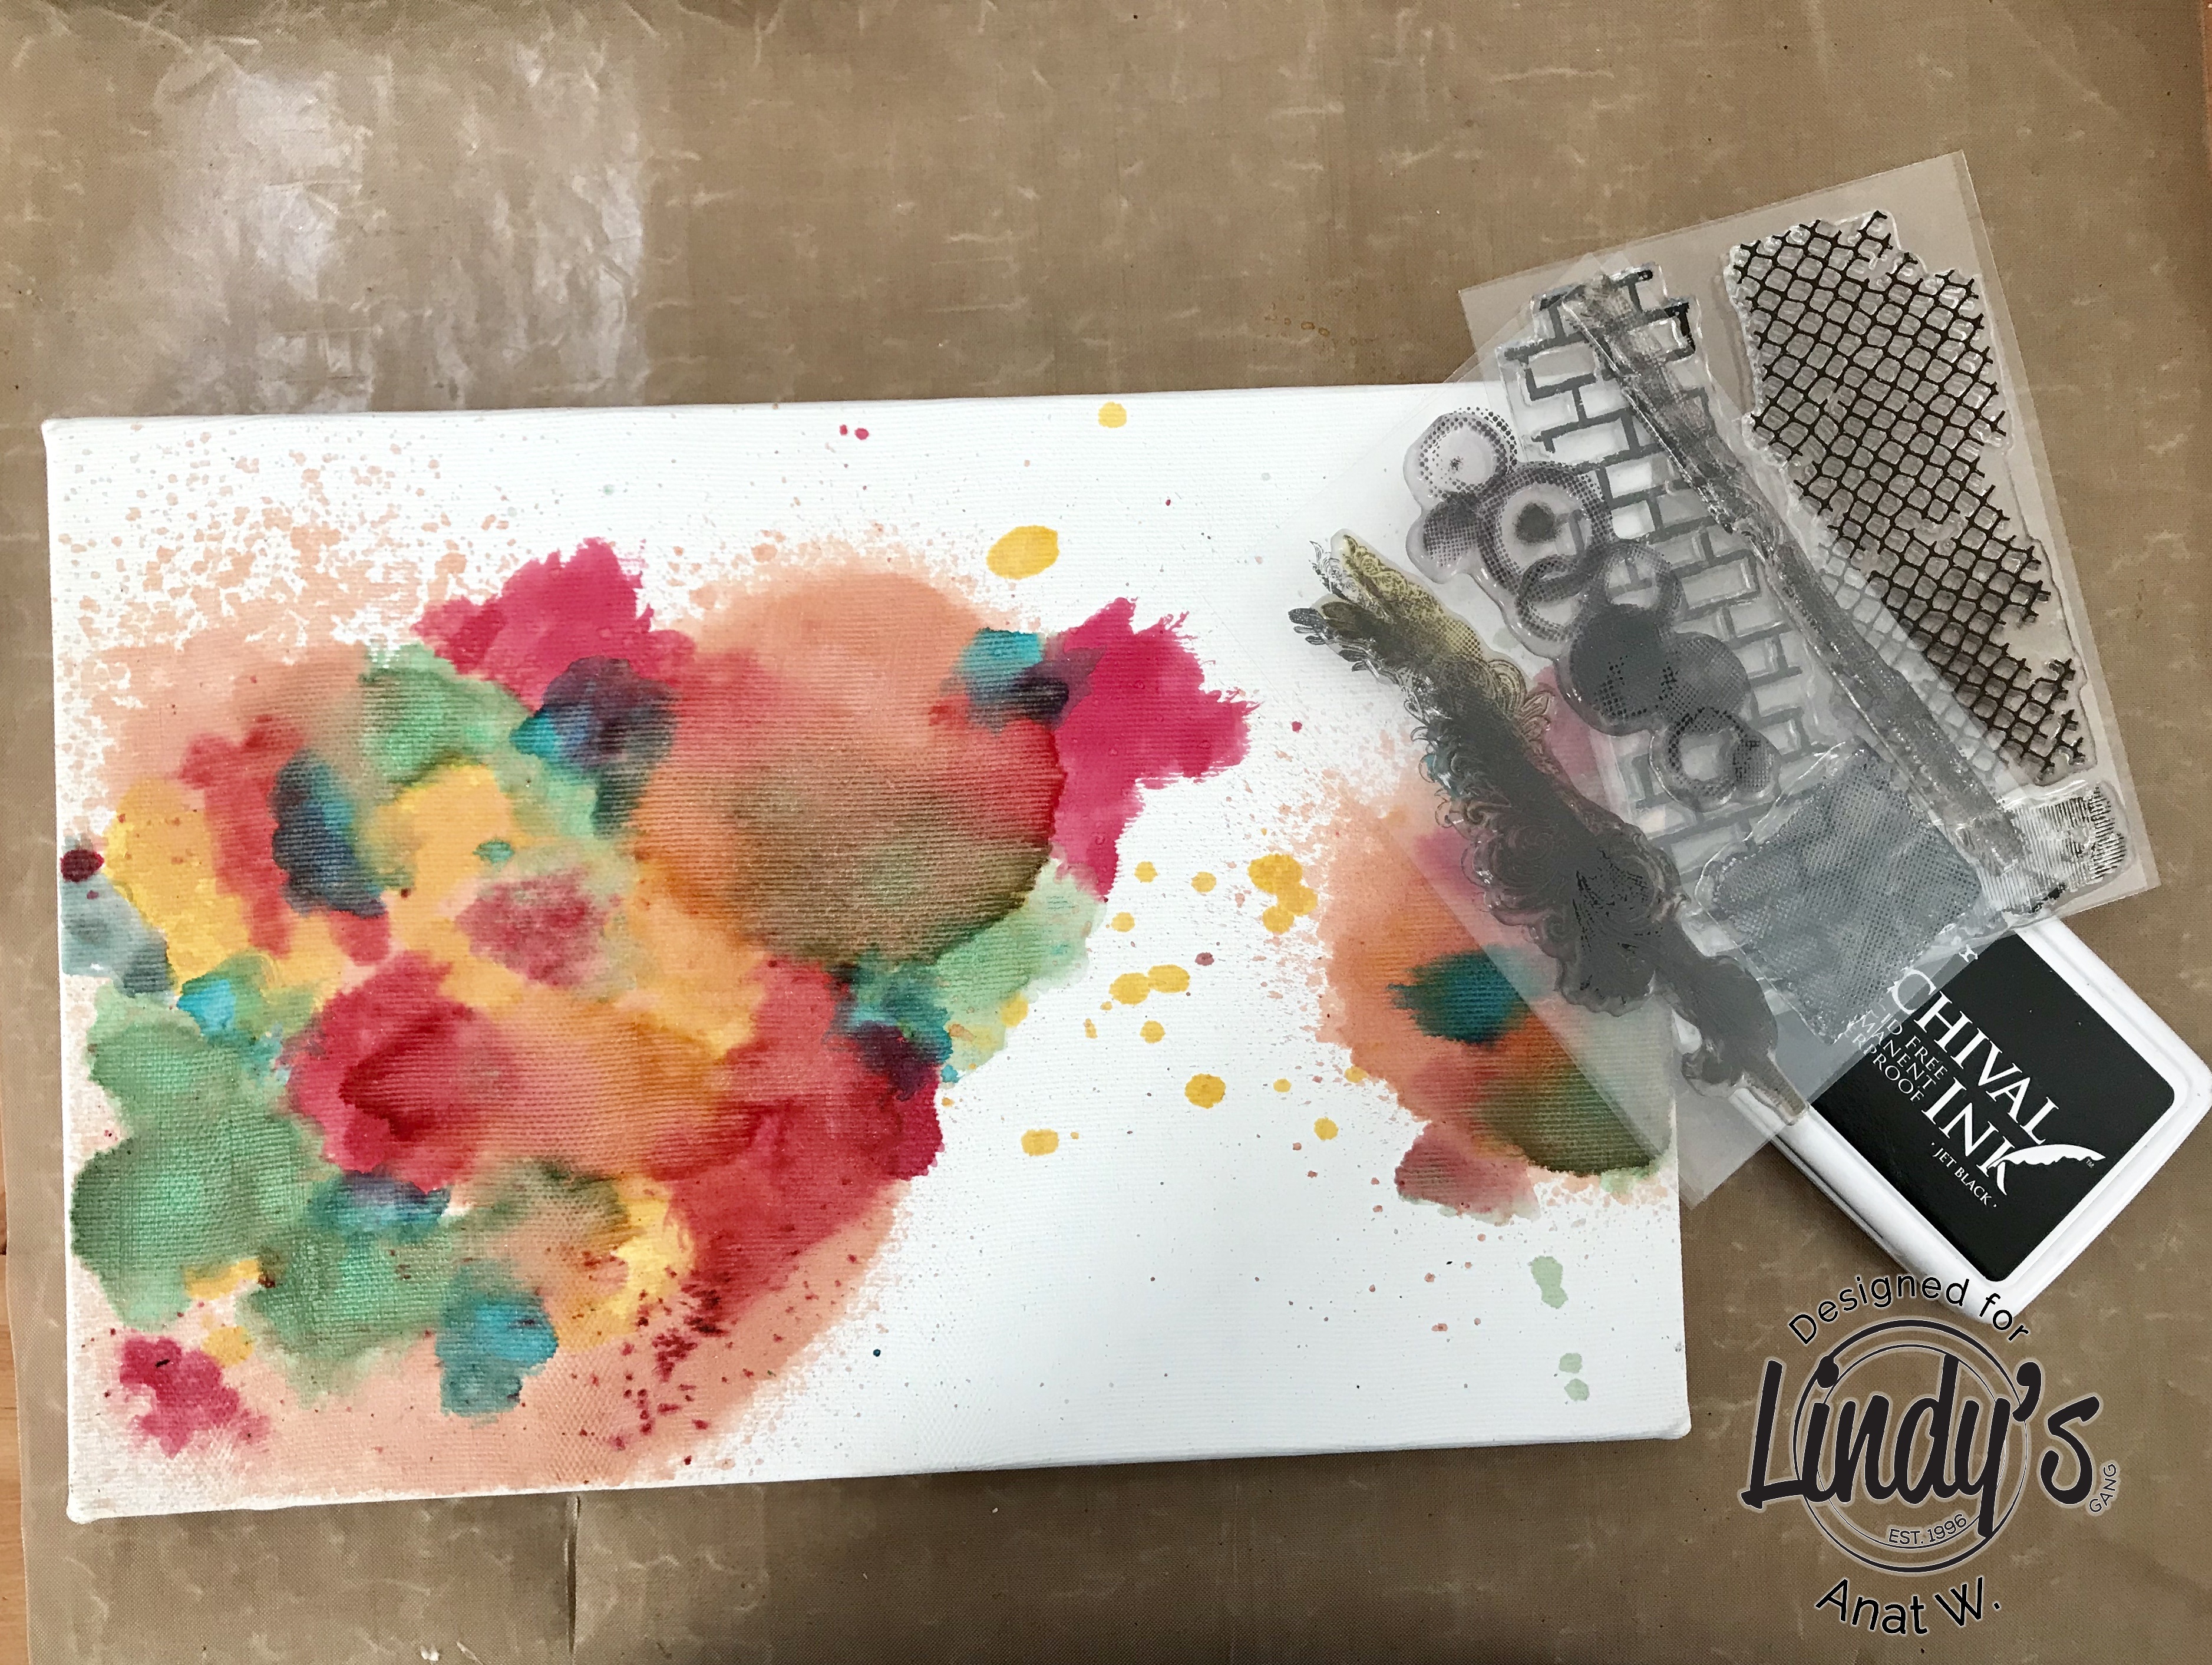 Next, I stamped with archival black and color inks.
 You can see it here
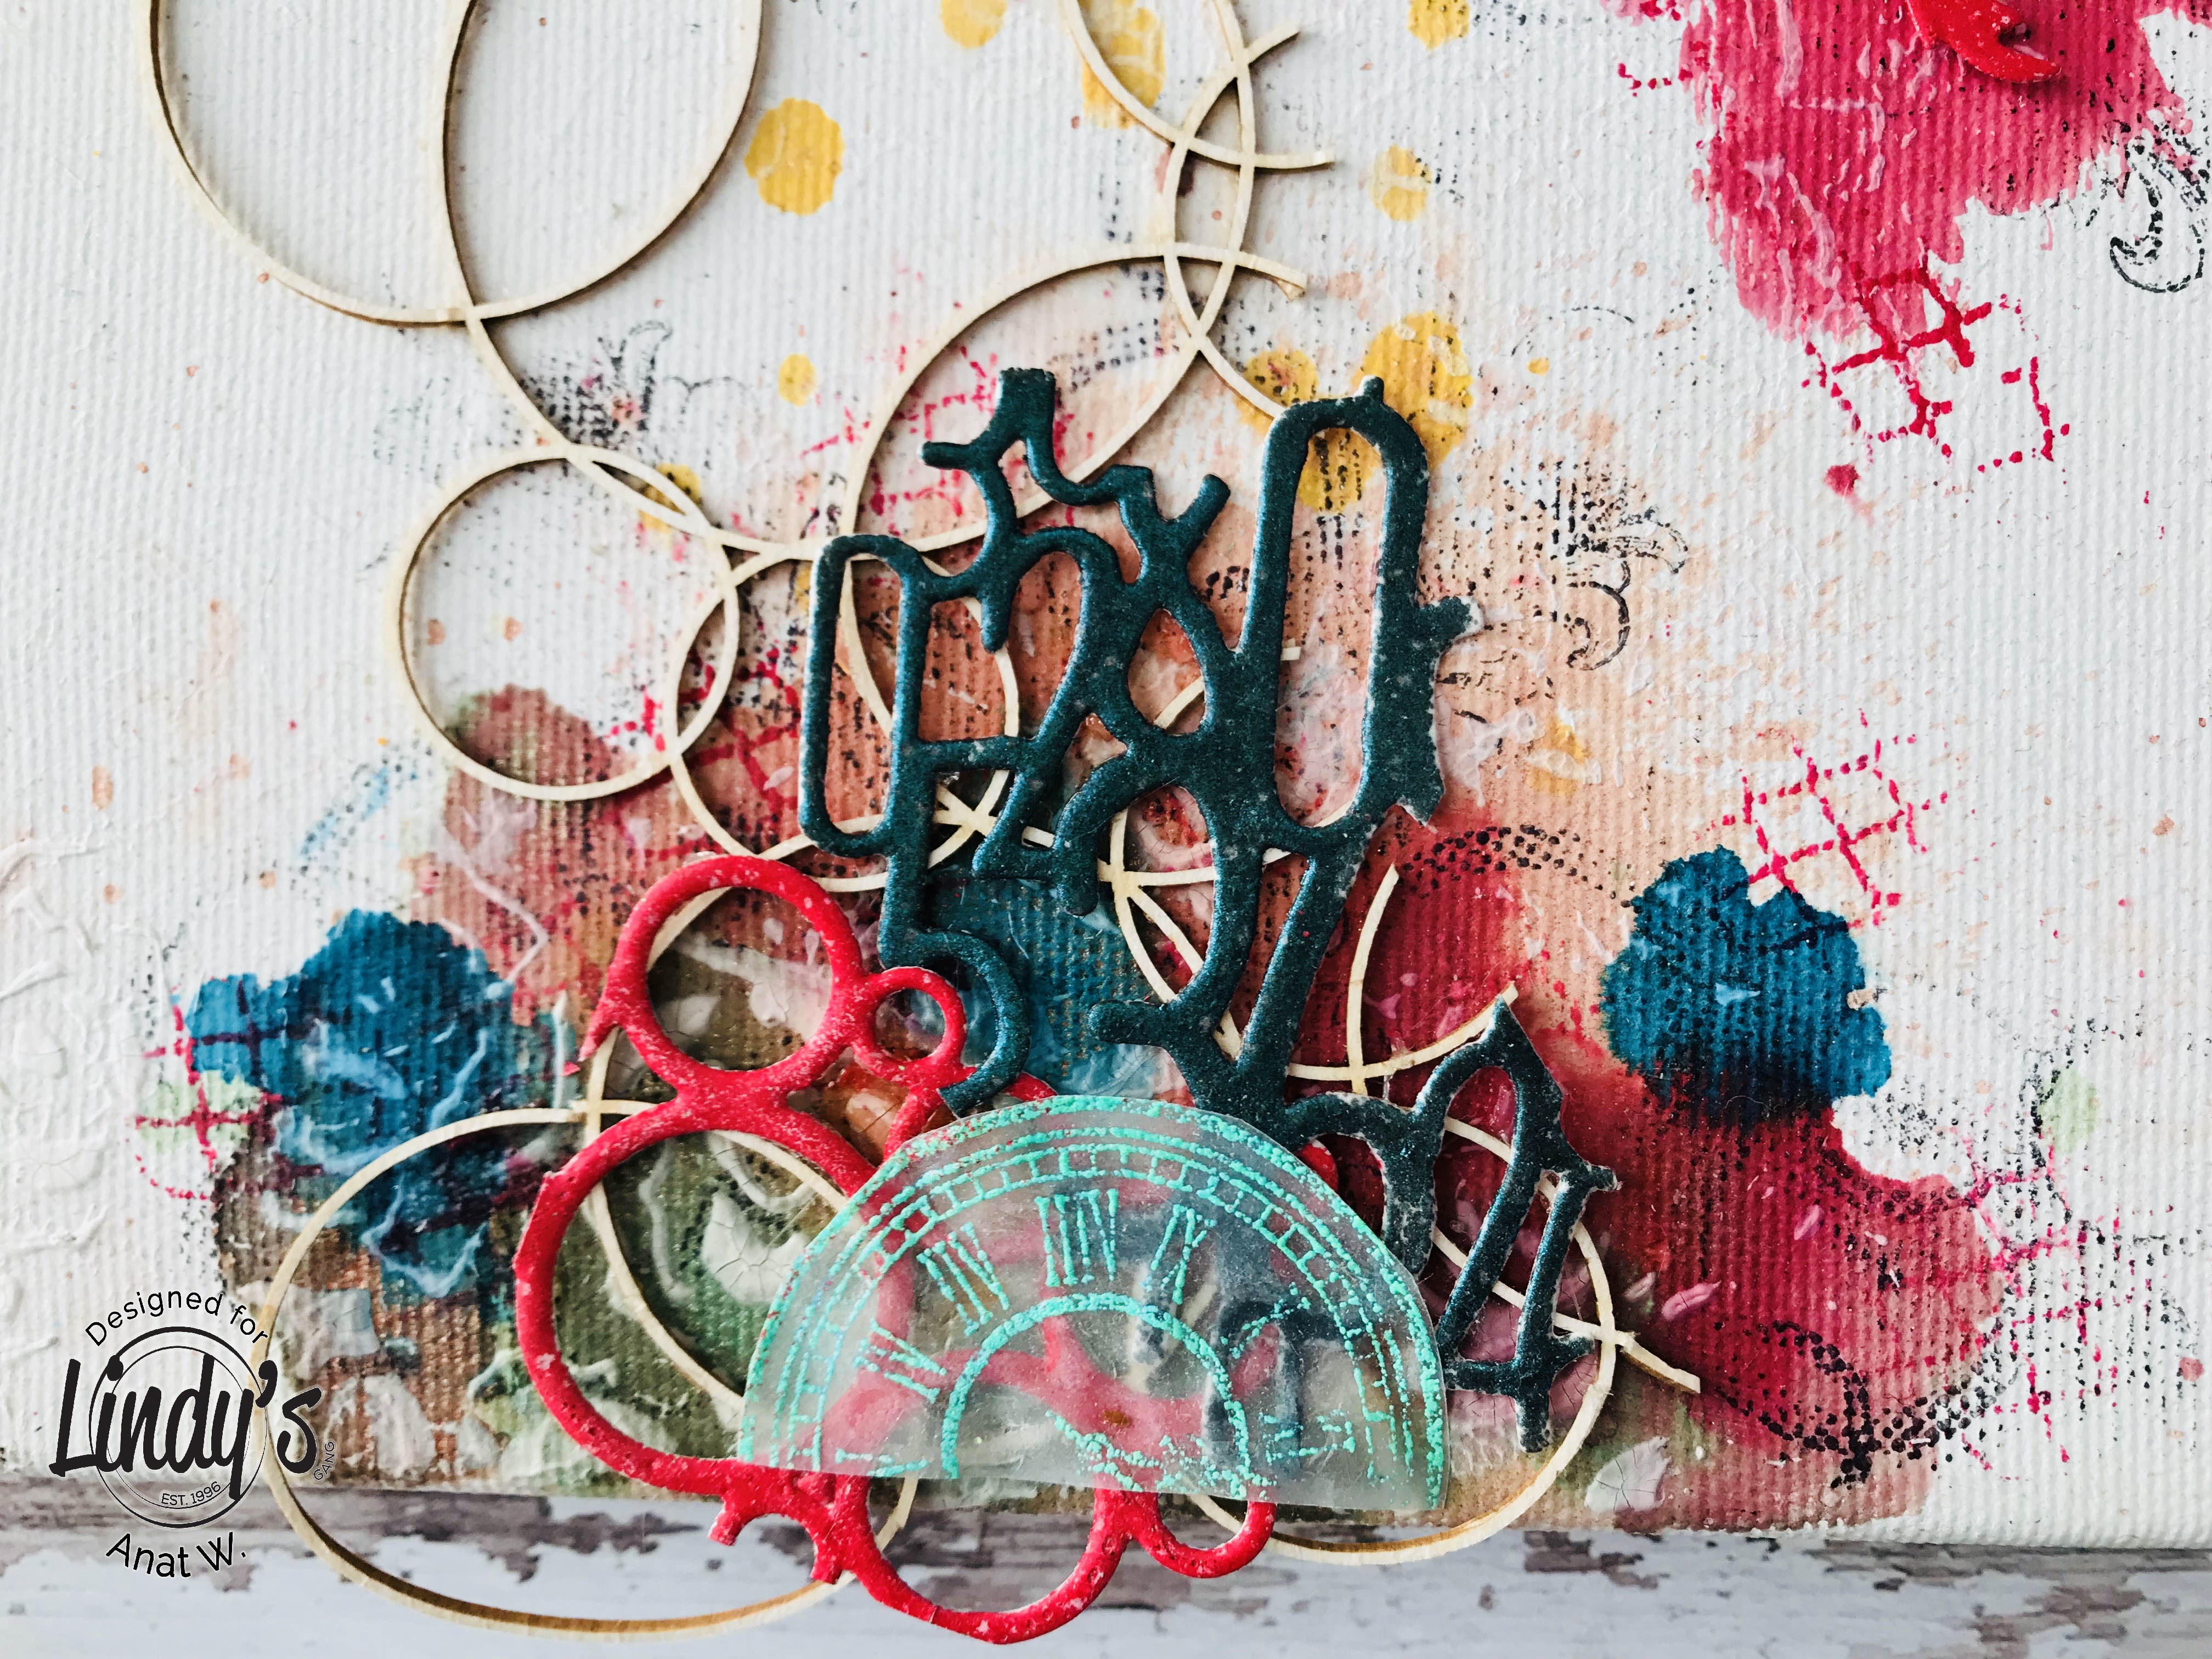
 My favorite technique to color paper die-cuts is embossing. As you can see, I used a few Embossing Powders: Desert Moon Turquoise EP, Midnight Teal EP, Midnight Pewter EP, Caesar's Gold EP and Cuckoo Clock Cardinal EP
 I needed a few more embellishments stamped and hot embossed, this time I used Cuckoo Clock Cardinal EP and Sassy Sapphire EP.
 I added thin chipboard circles and left them with their natural color
 As I can't do without some texture I added it with modeling paste through a stencil
Time to put everything together with gel medium.
As the picture matting, I've chosen some papers and a couple of matching tags.
As you can see when I've got to this point I decided to change the canvas direction.
And this is what I came with! I love the result and I hope you do too!

So give it a go – it’s easier than you think!
Here are some extra photos so you can see all the details.


LINDY’S PRODUCTS
- Sprays: Rizzos Rowdy Red flat Spary, Grab a Guy Gold Shimmer Spray, Jack in the pulpit teal Shimmer spray, Time travel teal shimmer Spray and Cowabunga copper Shimmer Spray
- EP: Midnight teal, Midnight pewter, Caesars Gold, Cuckoo clock Cardinal and Sassy Sapphire
OTHER PRODUCTS
- Chipboards, Decoart Modeling Paste, Prima Stencil, assorted dies, Stamps and Inks
No comments:
Post a Comment