Hello dears!
Sharing today a new Step by Step tutorial made for Lindy's Stamp Gang.
The Step by Step will guide you to create a Canvas where the background has a very important role and the elements on top will only complement it differntley from the projects you choose a Background to match the composition which will take place above it.

Let's start:

First step: spread modeling paste through a stencil and before it is dry add Magic Moon Pearls EP and heat emboss it.
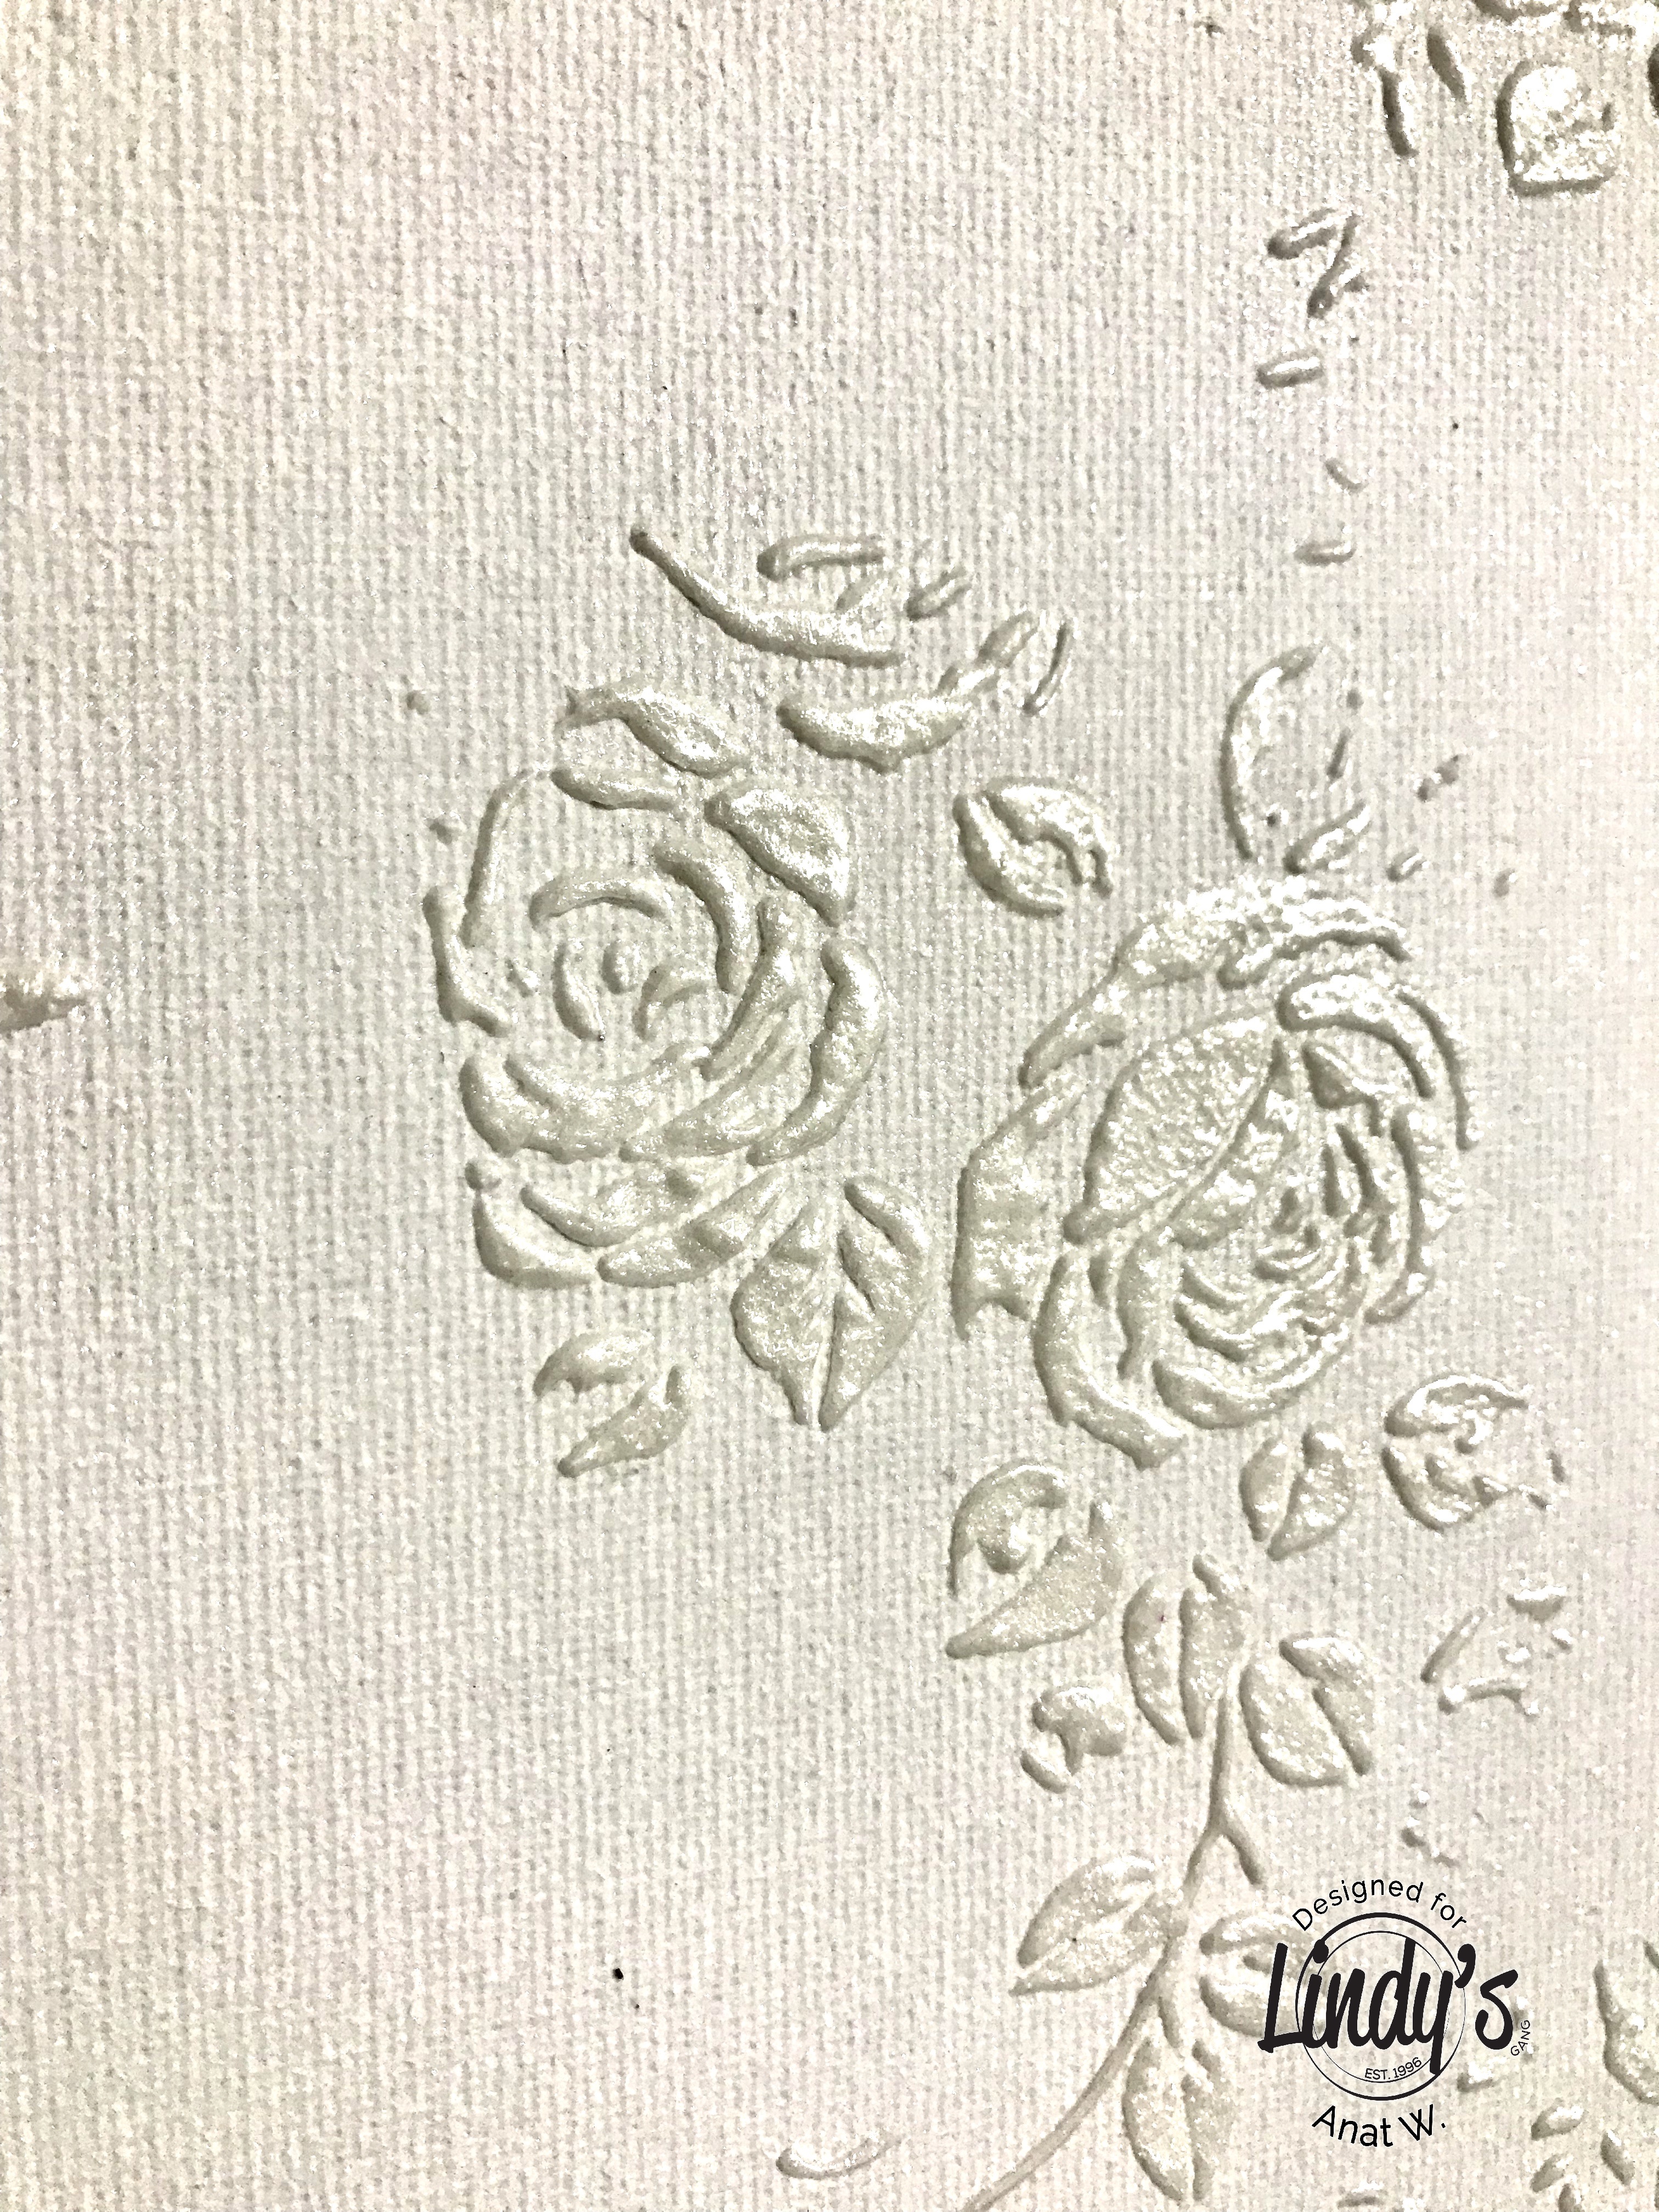
zoom:look how amazing it is

Adding color to all canvas with Guten tag teal Shaker and water. Sparkle on top some of the magical Shaker and add spritz of water. Play with the intensity of the color with the amount of water you're adding, acording to the tone you wish to acheive.

That's how it turned out...
* Next step is: spread white crackle paste through a stencil (different from the first one), somehow this photo disappeared.
 Make some stamping with Archival ink.
Add color with Yellow Rose of Texas and Alpine Ice Rose Sprays

That's how it looks
 Look at the gorgeous Shimmer
Add white splashes with Sidewalk Chalk Flat Fabio Spray

Color the Chipboard Clock with Midnight Ruby EP

Add gold Splashes with Yellow Rose of Texas and Grub a Guy Gold Sparys. Add a glitter Brad to hold the clock hands.

I love the effect of the sprays on top of the EP!

Color some paper die-cuts with Grab a Guy Gold.
 Add piece of crochet and glue the Clock on top, add some flowers, metal elements, lace flowers with Heavy body gel.
In order to bring every thing together we need to add some splashes on top of the Embellishments, especially the white ones. I used Alpine Ice Rose, Incandescent Copper and Frozen Jack Frost Sprays
Last step: add a sentiment.


Lindys Products
- Sprays: Yellow Rose of Texas, Grab a Guy Gold, Alpine Ice Rose, Frozen Jack Frost Shimmer sprays, Sidewalk Chalk Flat Fabio Spray and Incandescent Copper vintage spray.
- Magical Shaker: Guten tag teal Shaker
- Embossing Powder: Midnight Ruby, Magic Moon Pearls
- Canvas, Chipboard Clock, Embossing ink dubber, stamps, lace and crochet pieces, flowers, heavy body gel, modeling paste, White Crackle Paste, glitter brad, metal embellishments, paper die-cuts.
Hope you enjoyed the tutorial.
Thanks for stopping by xoxo