Showing posts with label lindy's magicals. Show all posts

Jan 15, 2020

Love completely - Altering a House shaped Frame

Hello crafty friends!
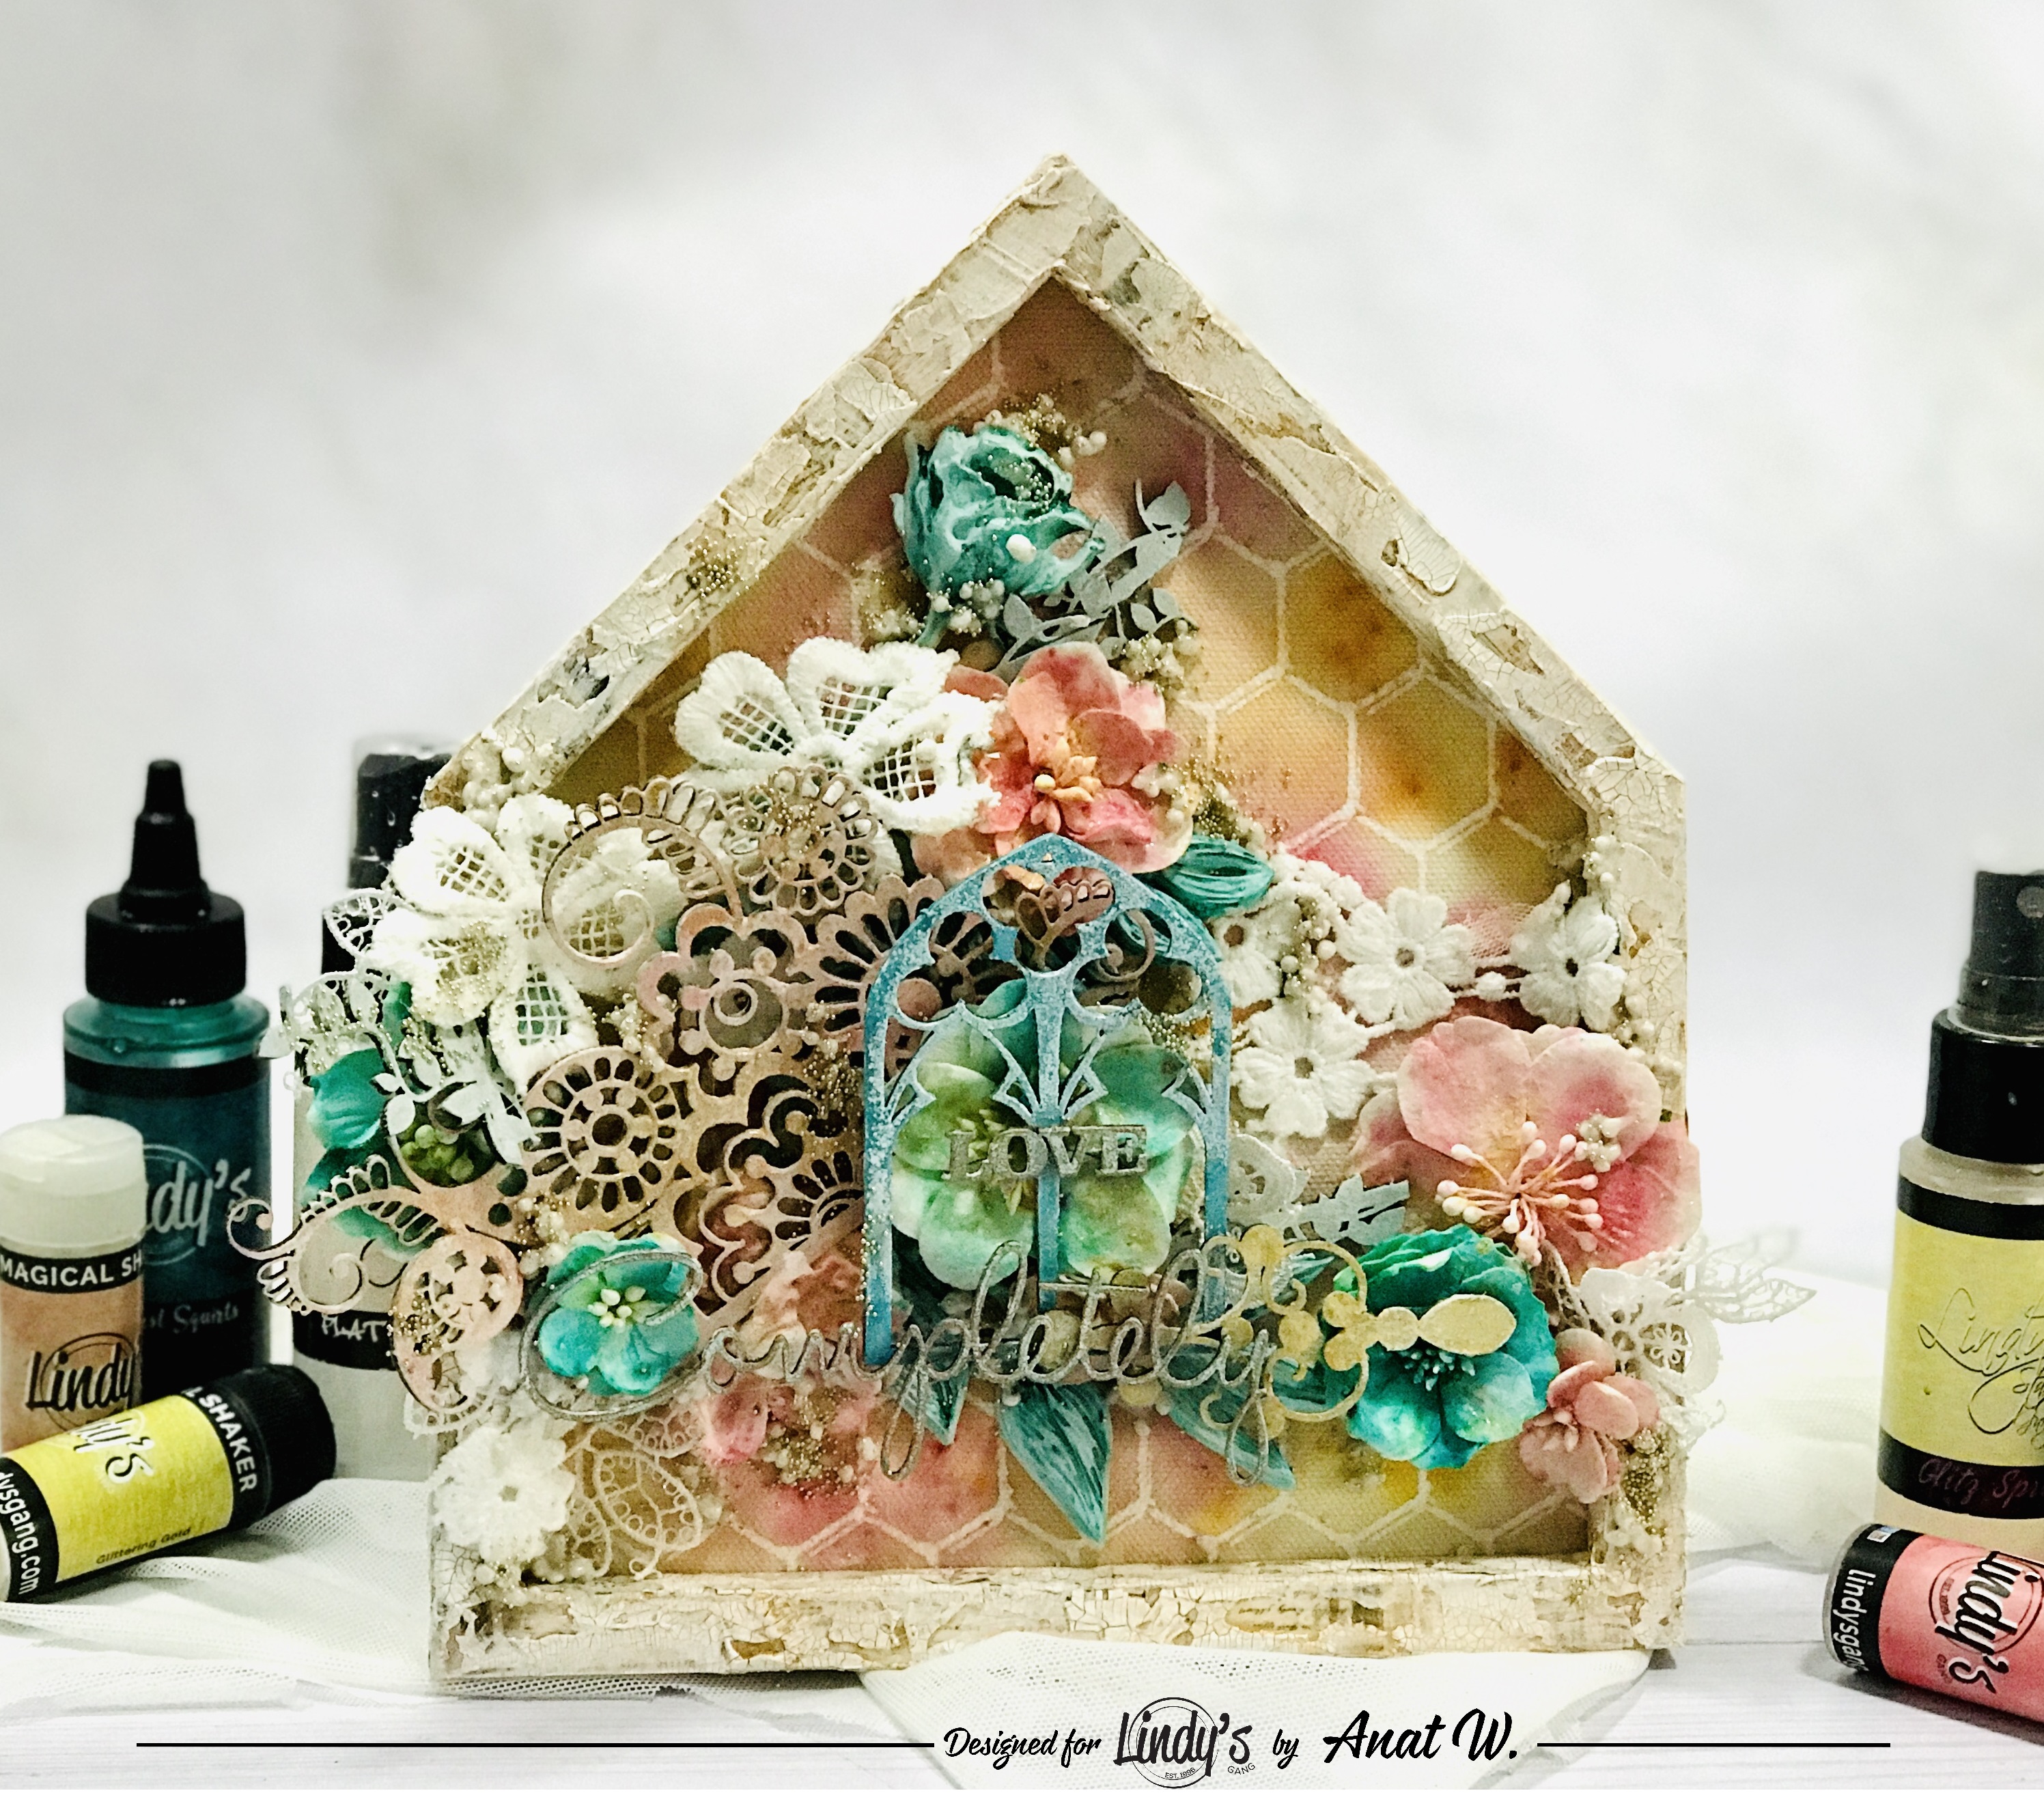
Anat Here with a new step by step tutorial. In this video I willl show how I altered a Wooden house shaped frame in  Shabby Style, using lots of shakers and some other Lindy's products.


So let's get started...

Basic Process

  • First Step: cut the House shape from a Resist Canvas - Lindy's matches gorgeously on it!
  • To color it I use water and 2 Lindy's shakers: Oom Pah pah Pink and California Poppy Gold
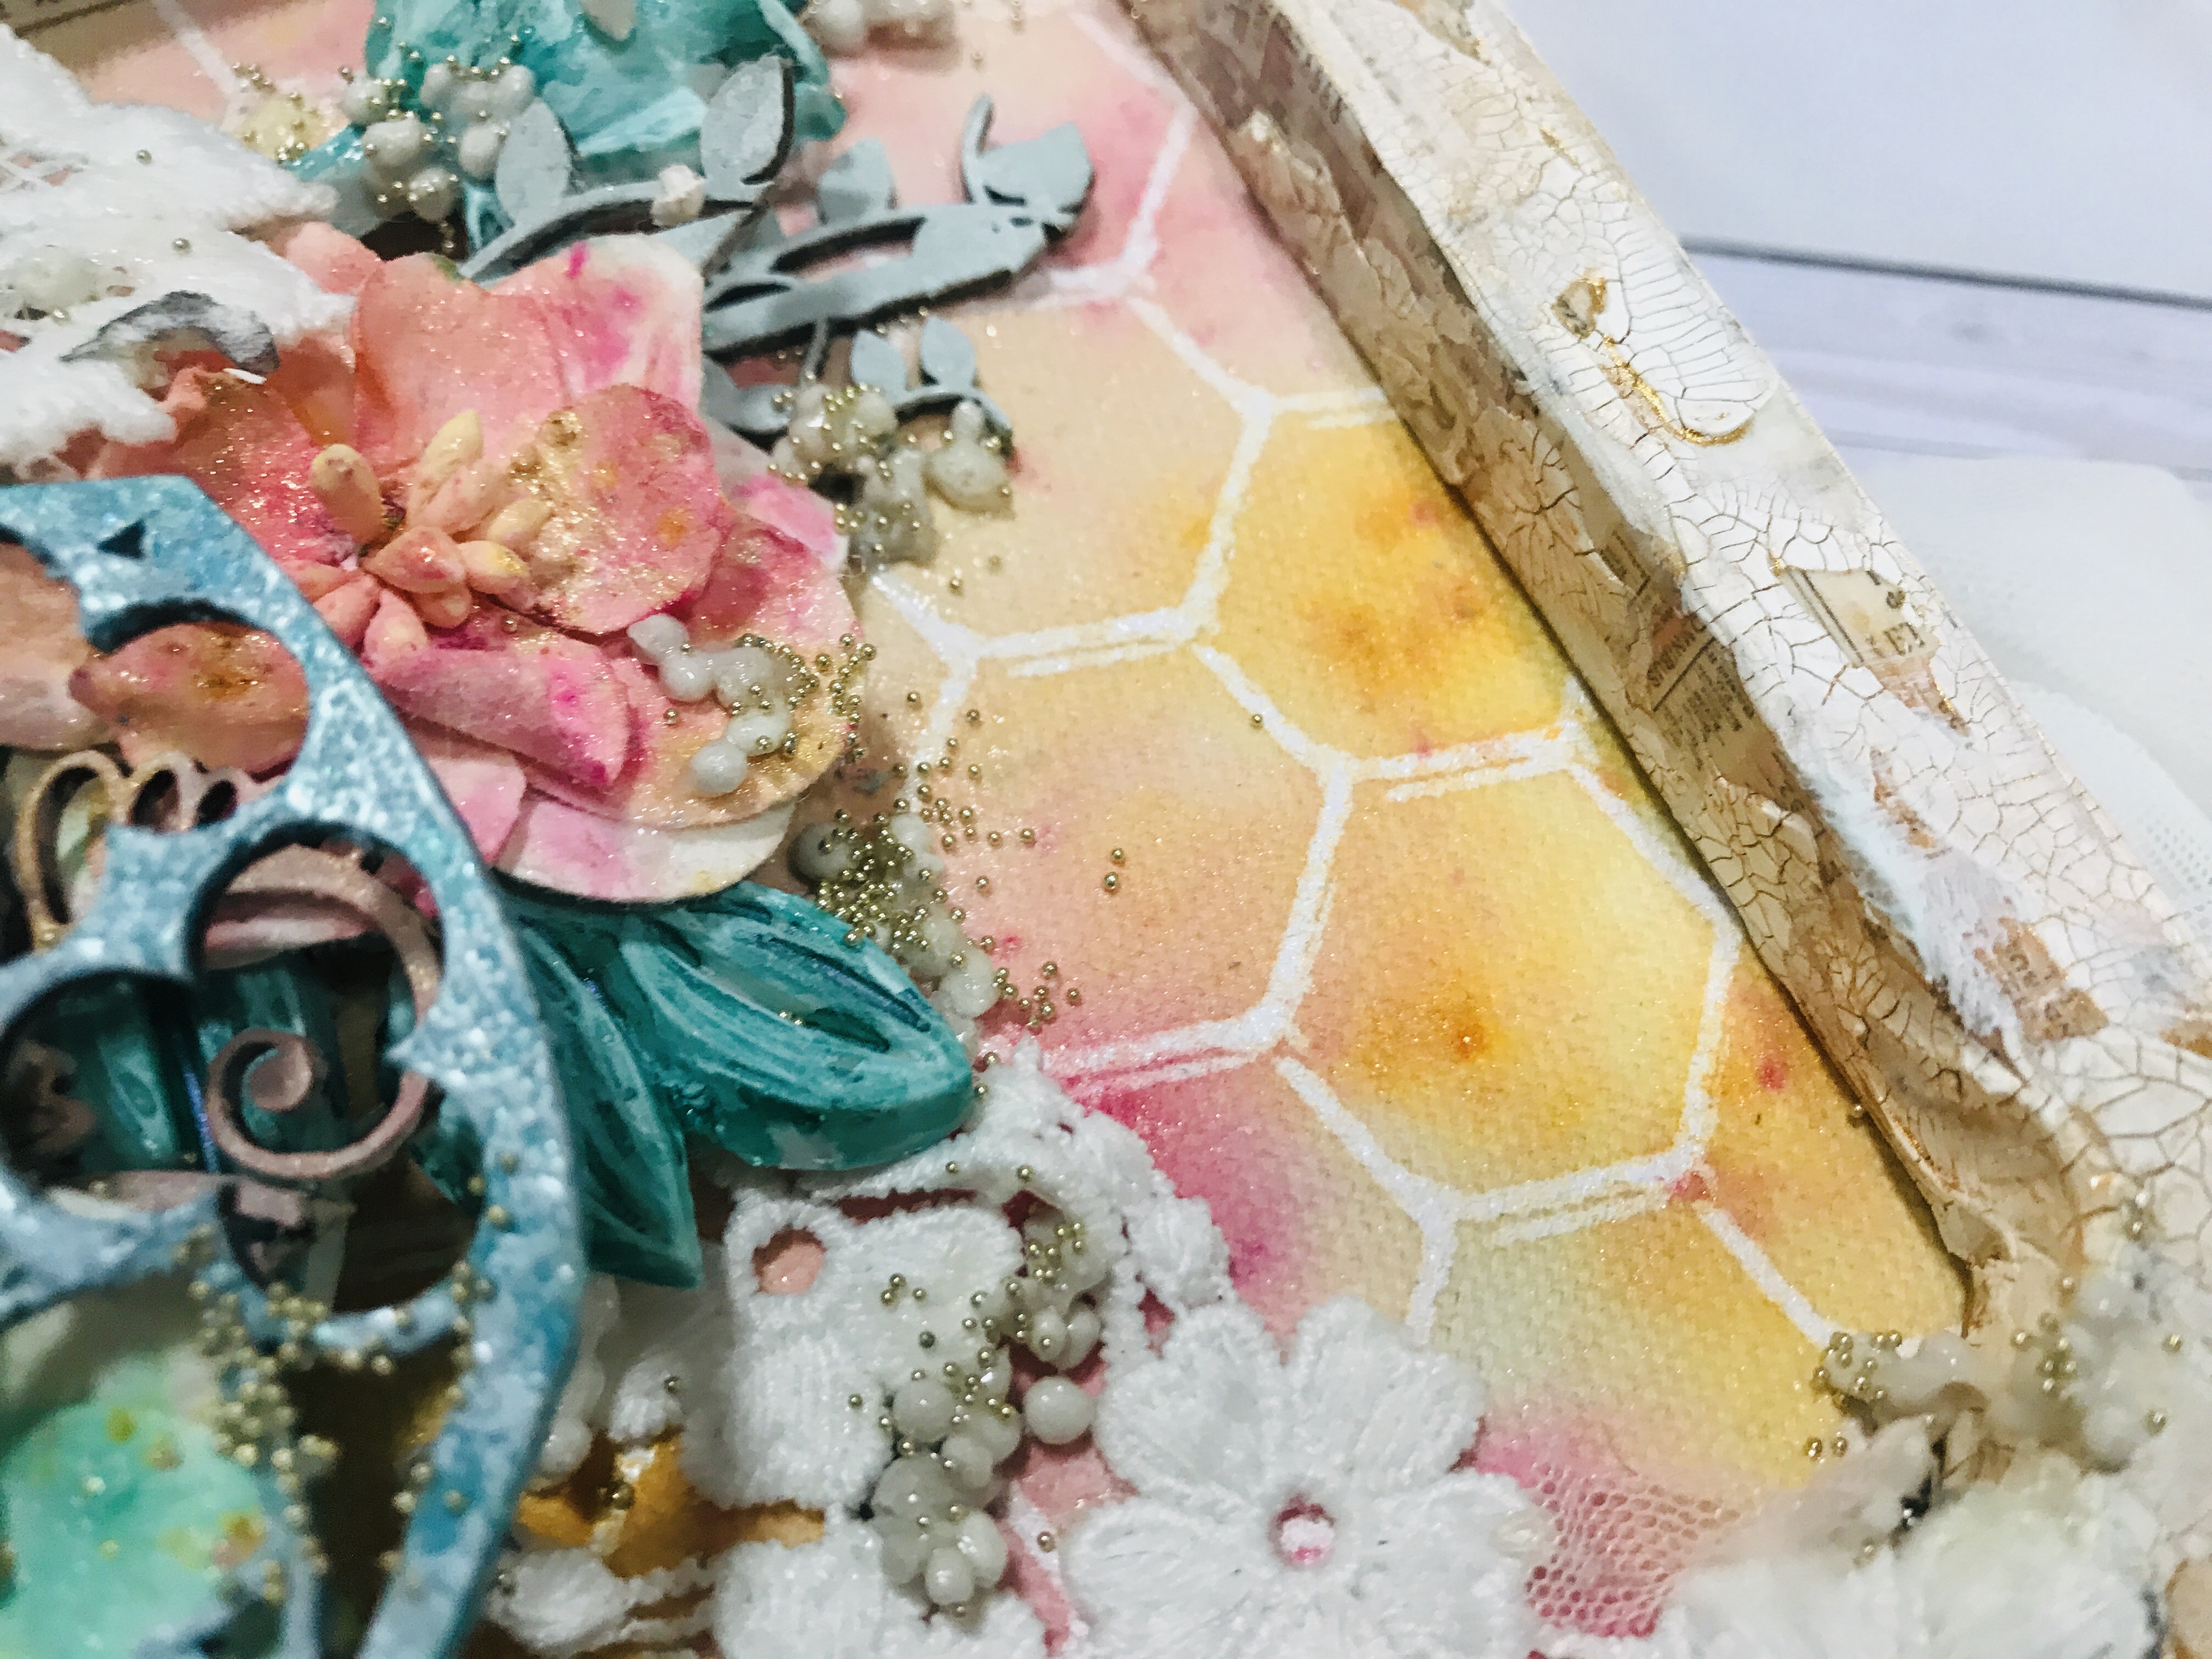
  • Cover the Frame with White Heavy Gesso
  • Dry it and add pieces of different Washi Tapes
  • Spread randomly, White Crackle paste
  • When dry I add to the cracked frame my favorite Lindy's Medieval Gold Glitz Spray
    tip: In case you are not familiar with the Glitz Sprays: These sprays contain just the shimmer! so they are perfect when you don't want to add color, only shimmer
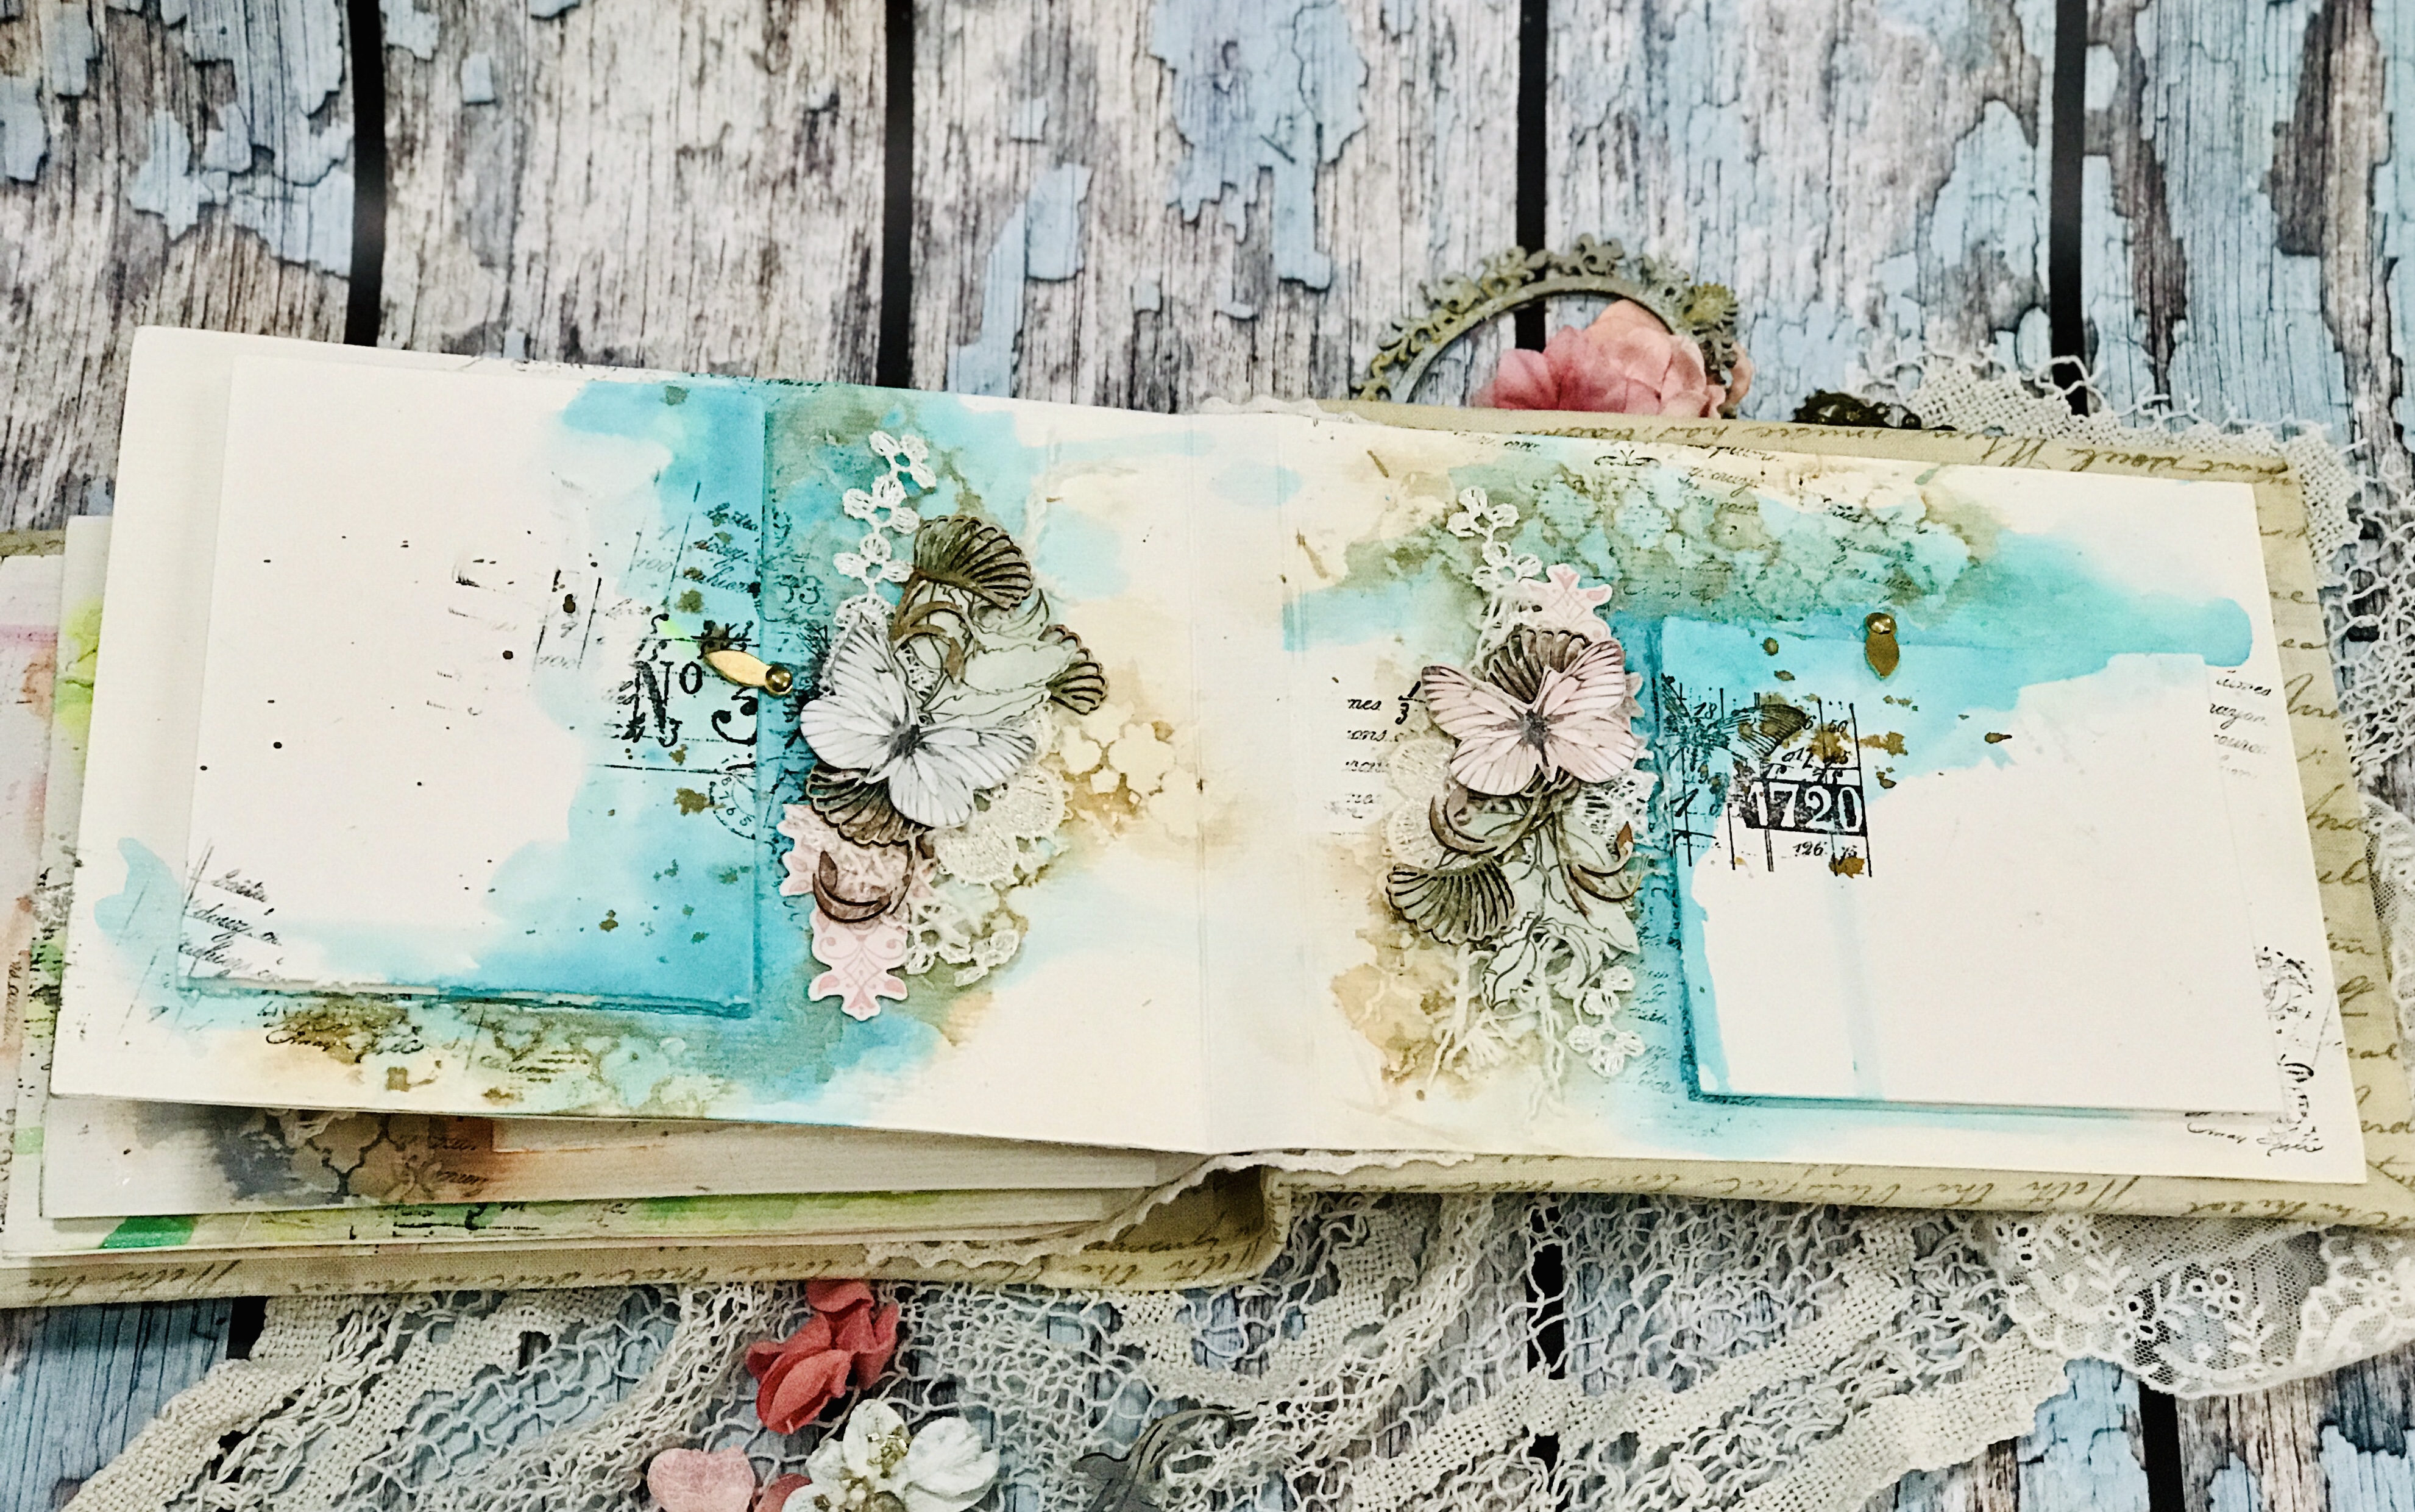
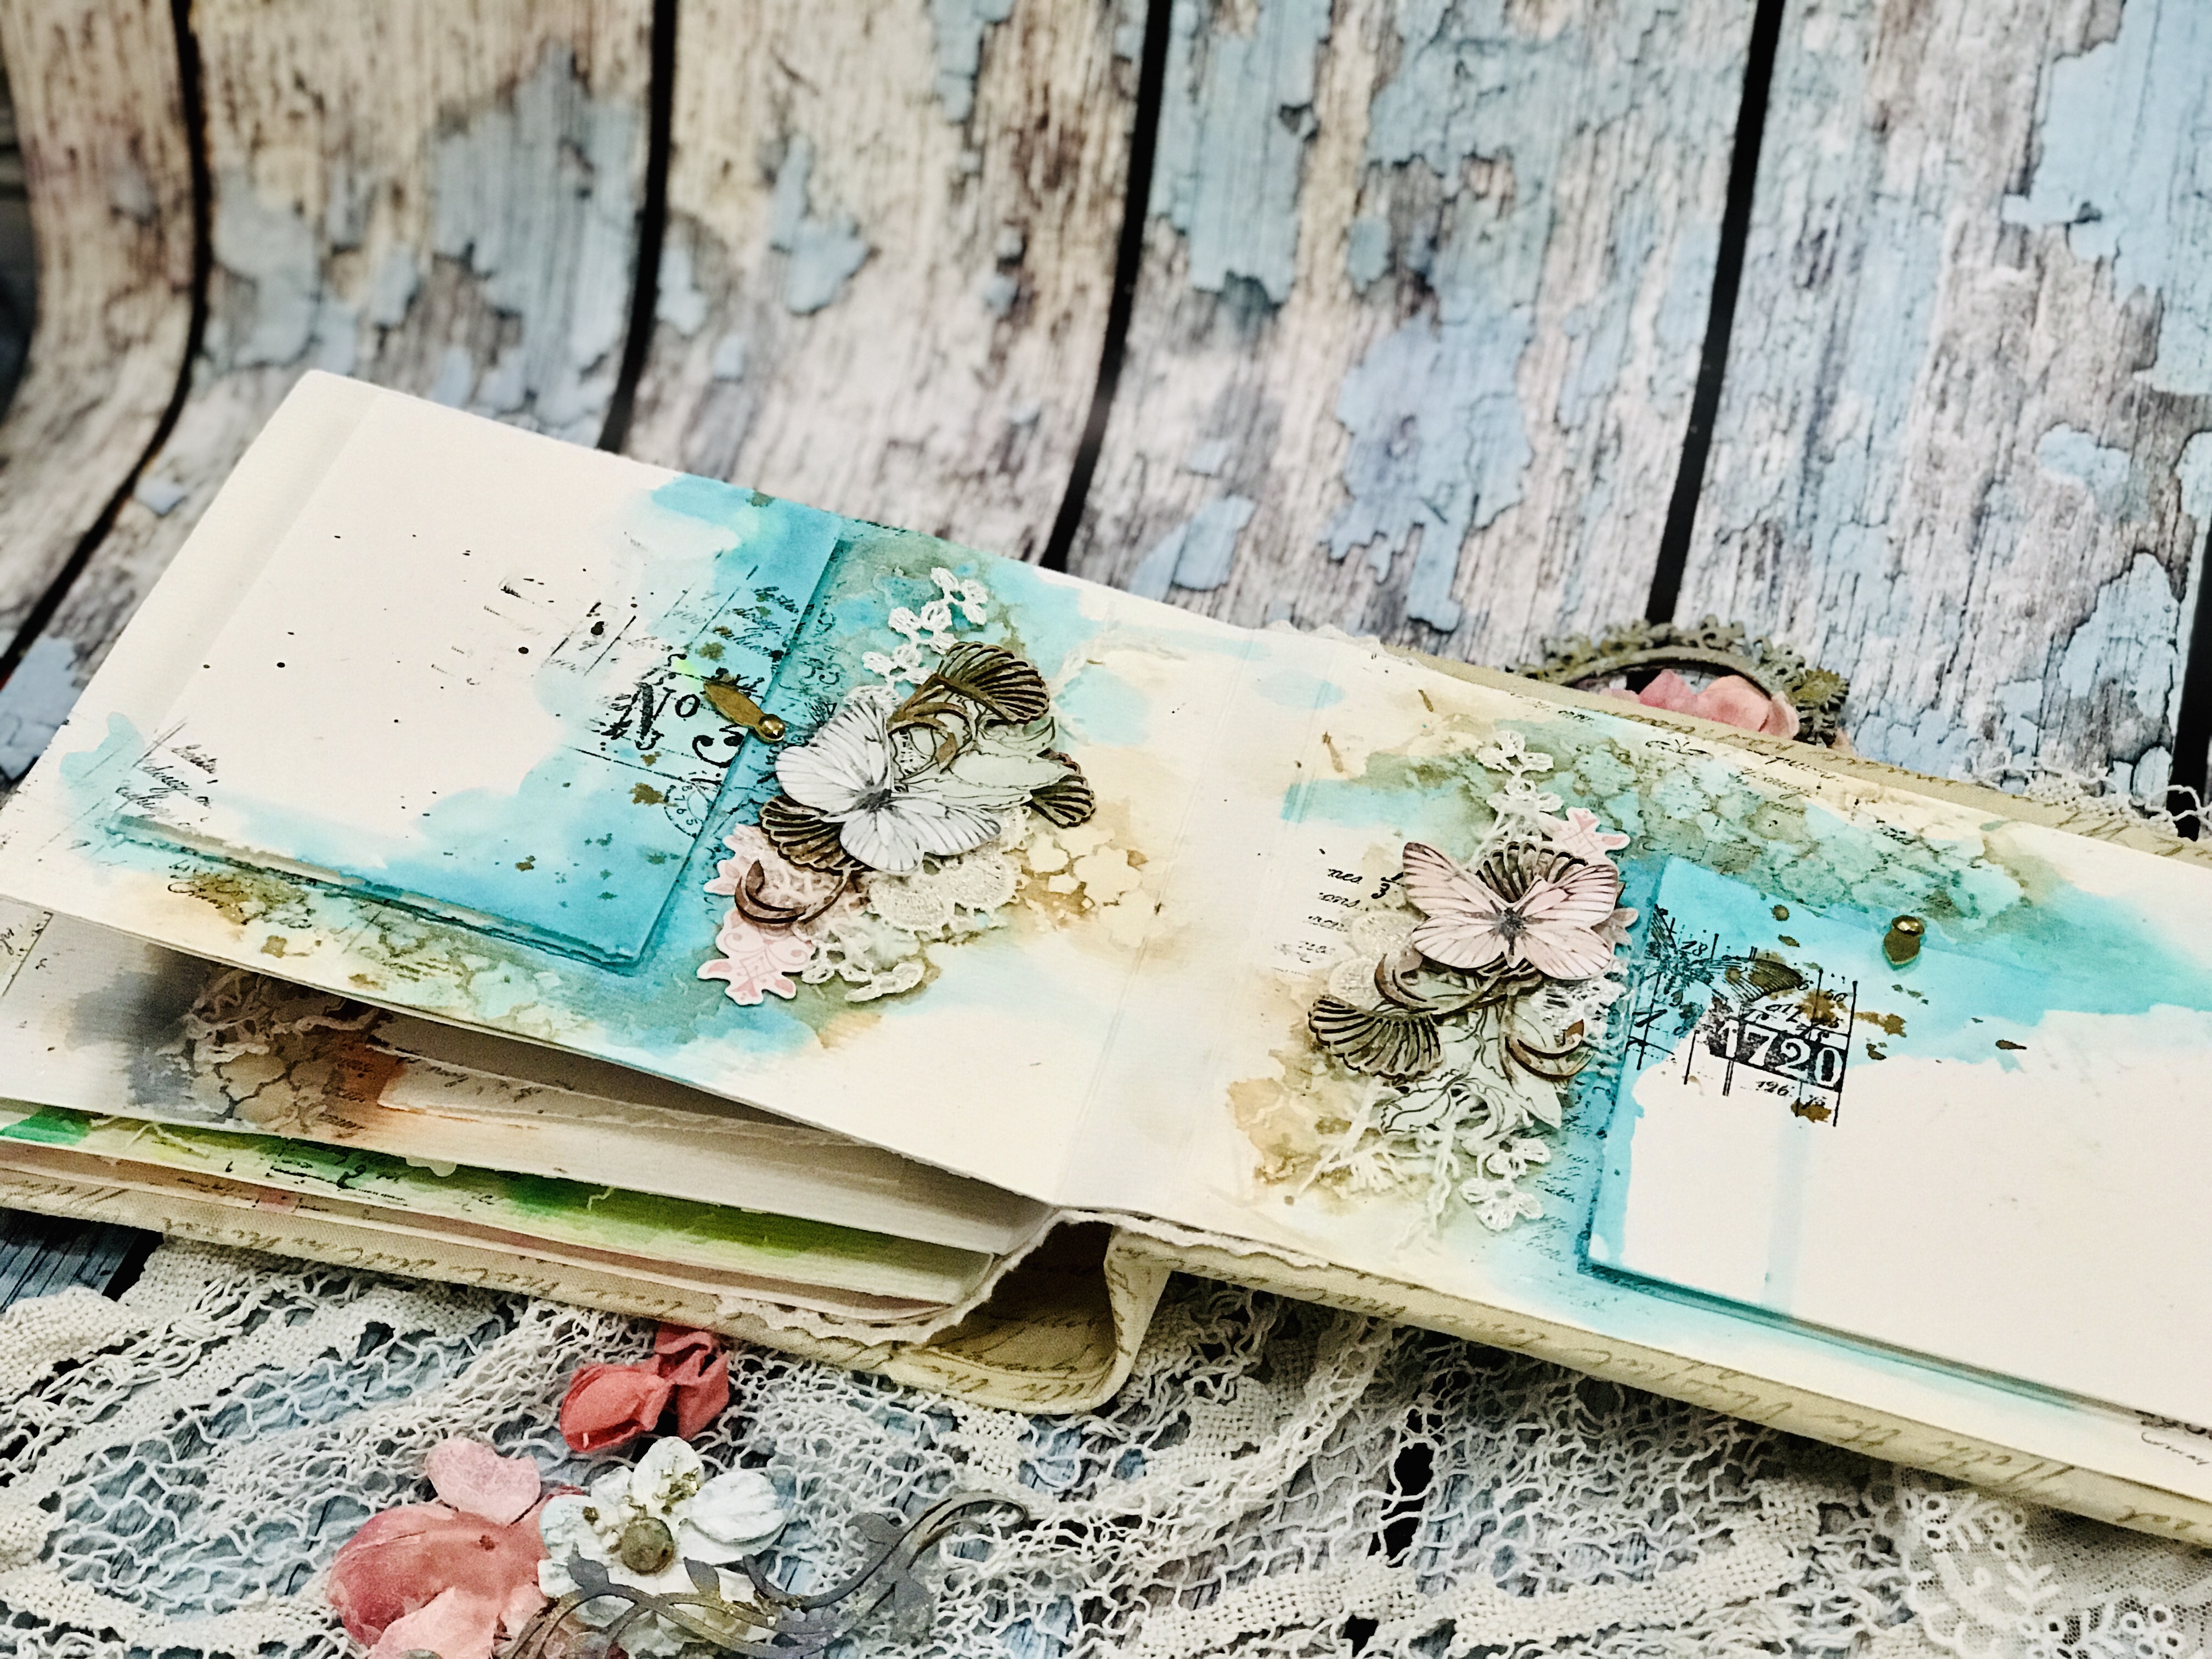
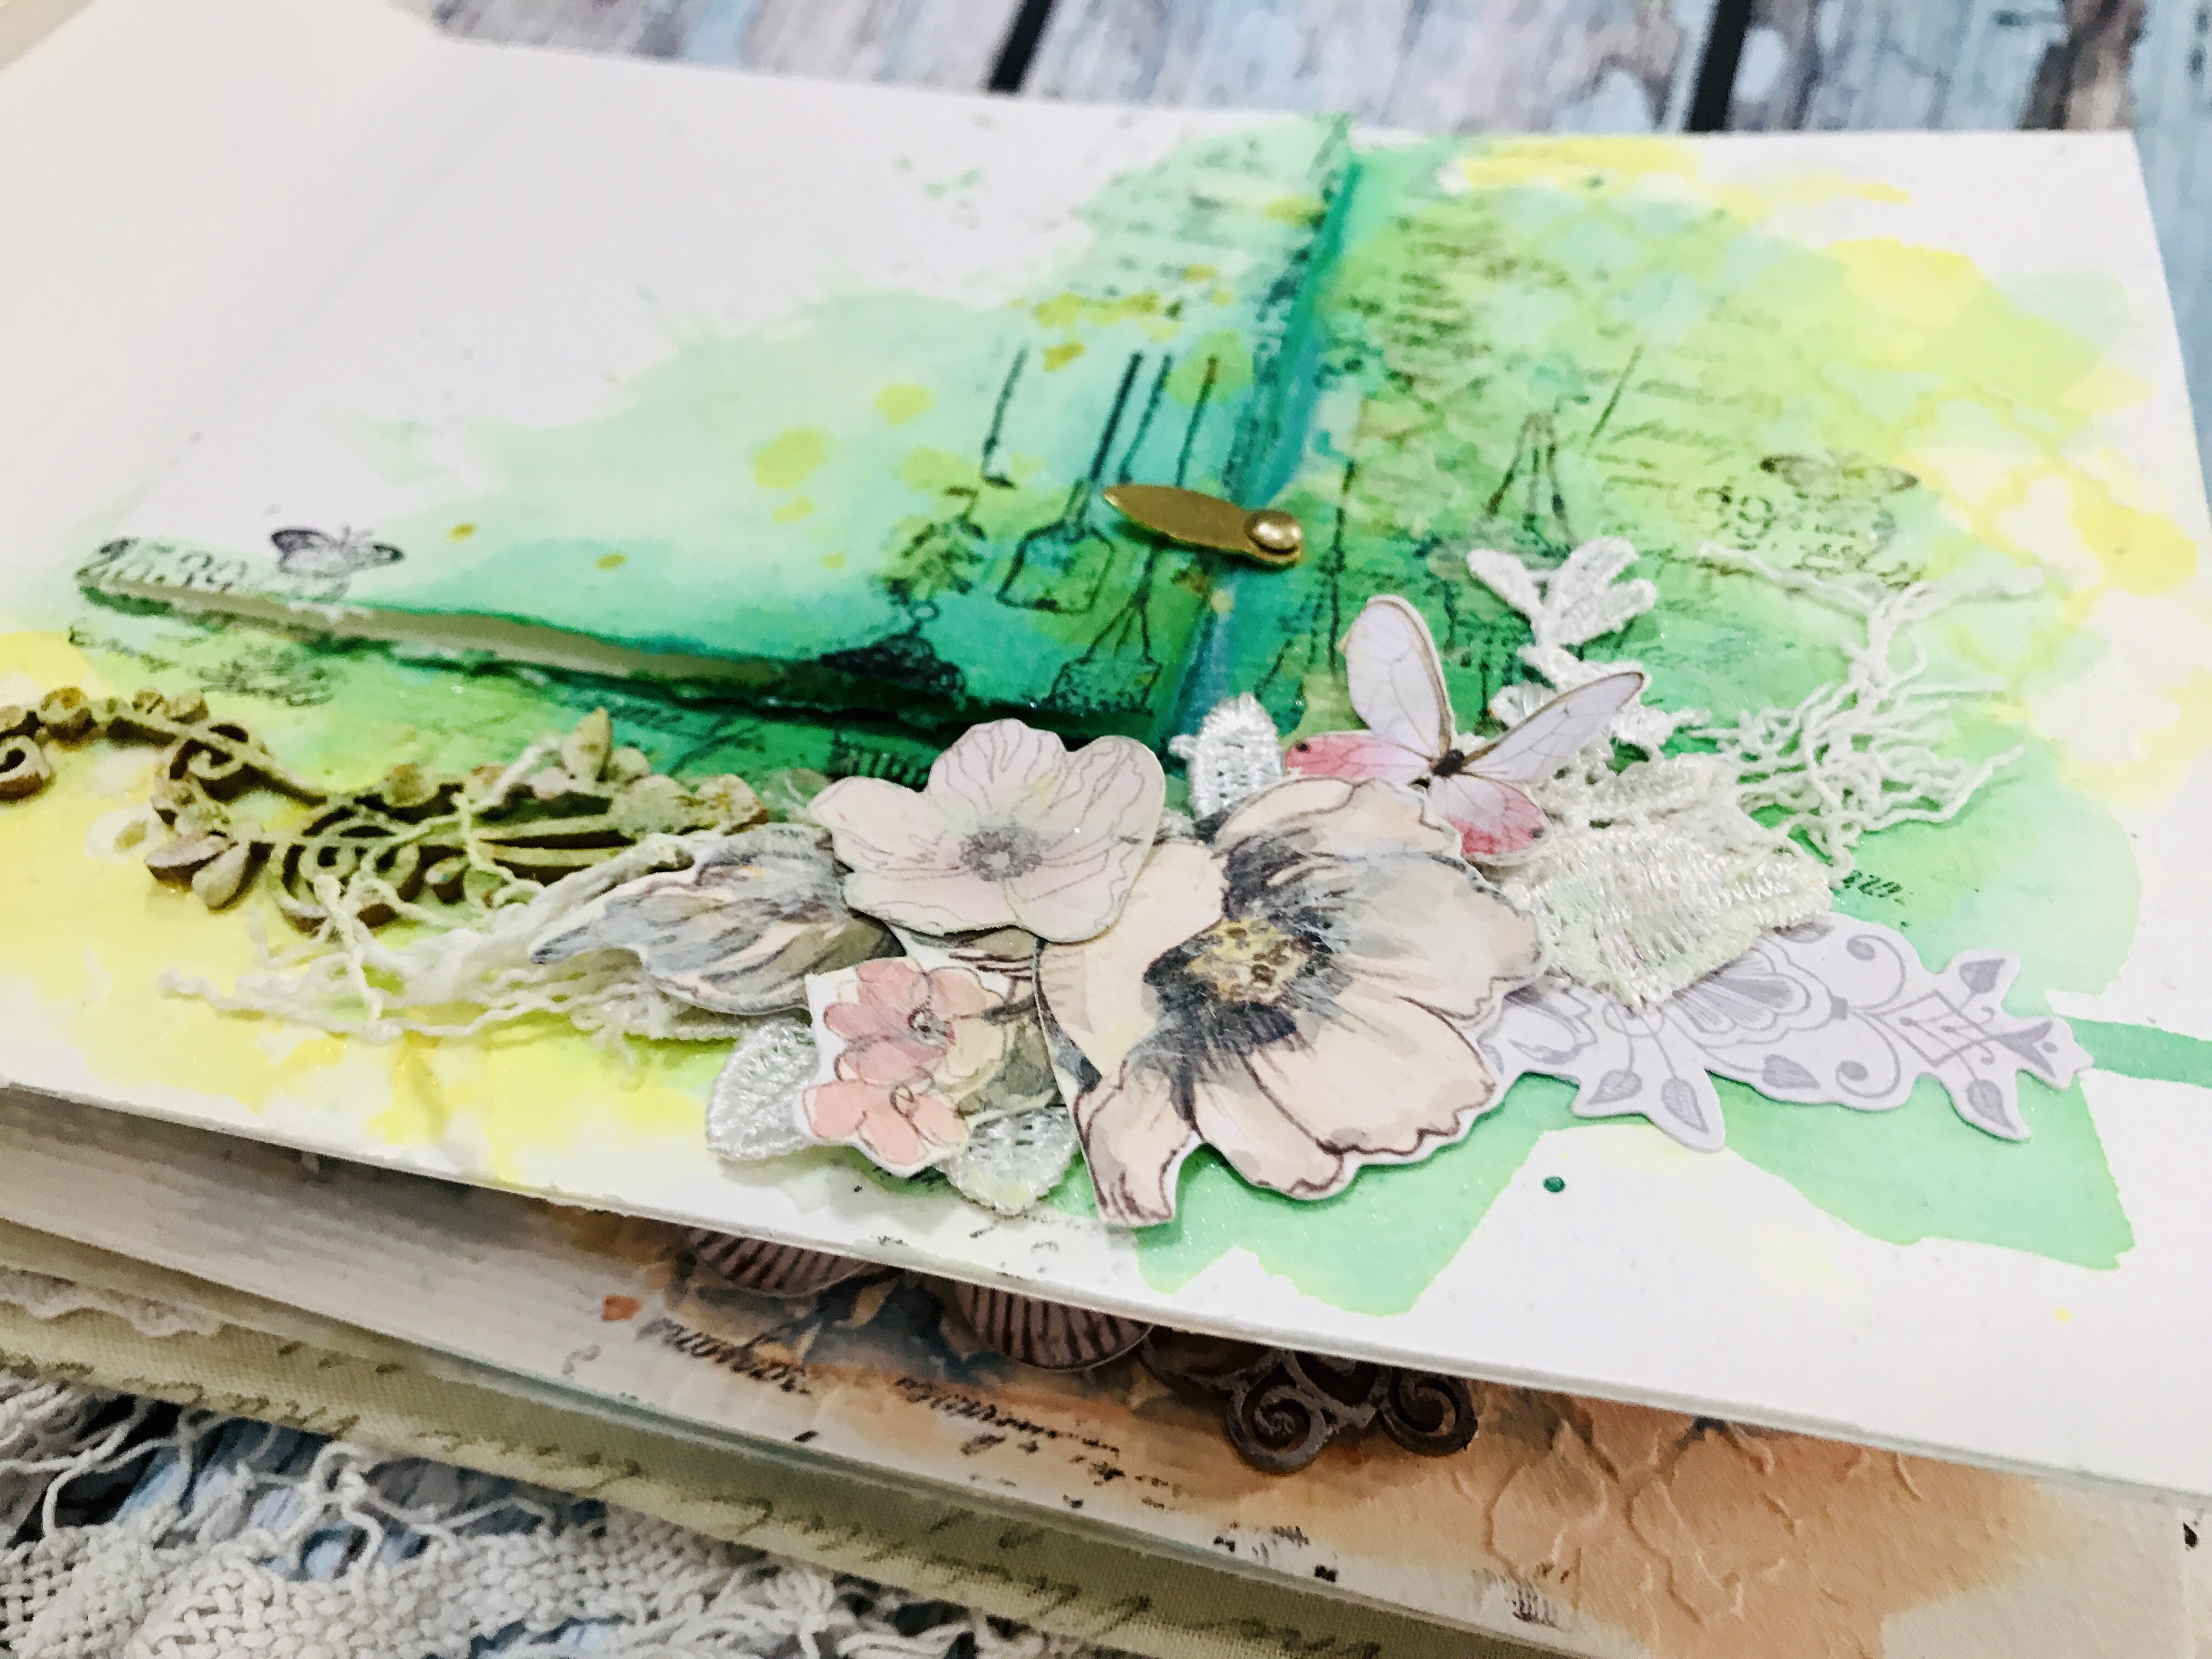
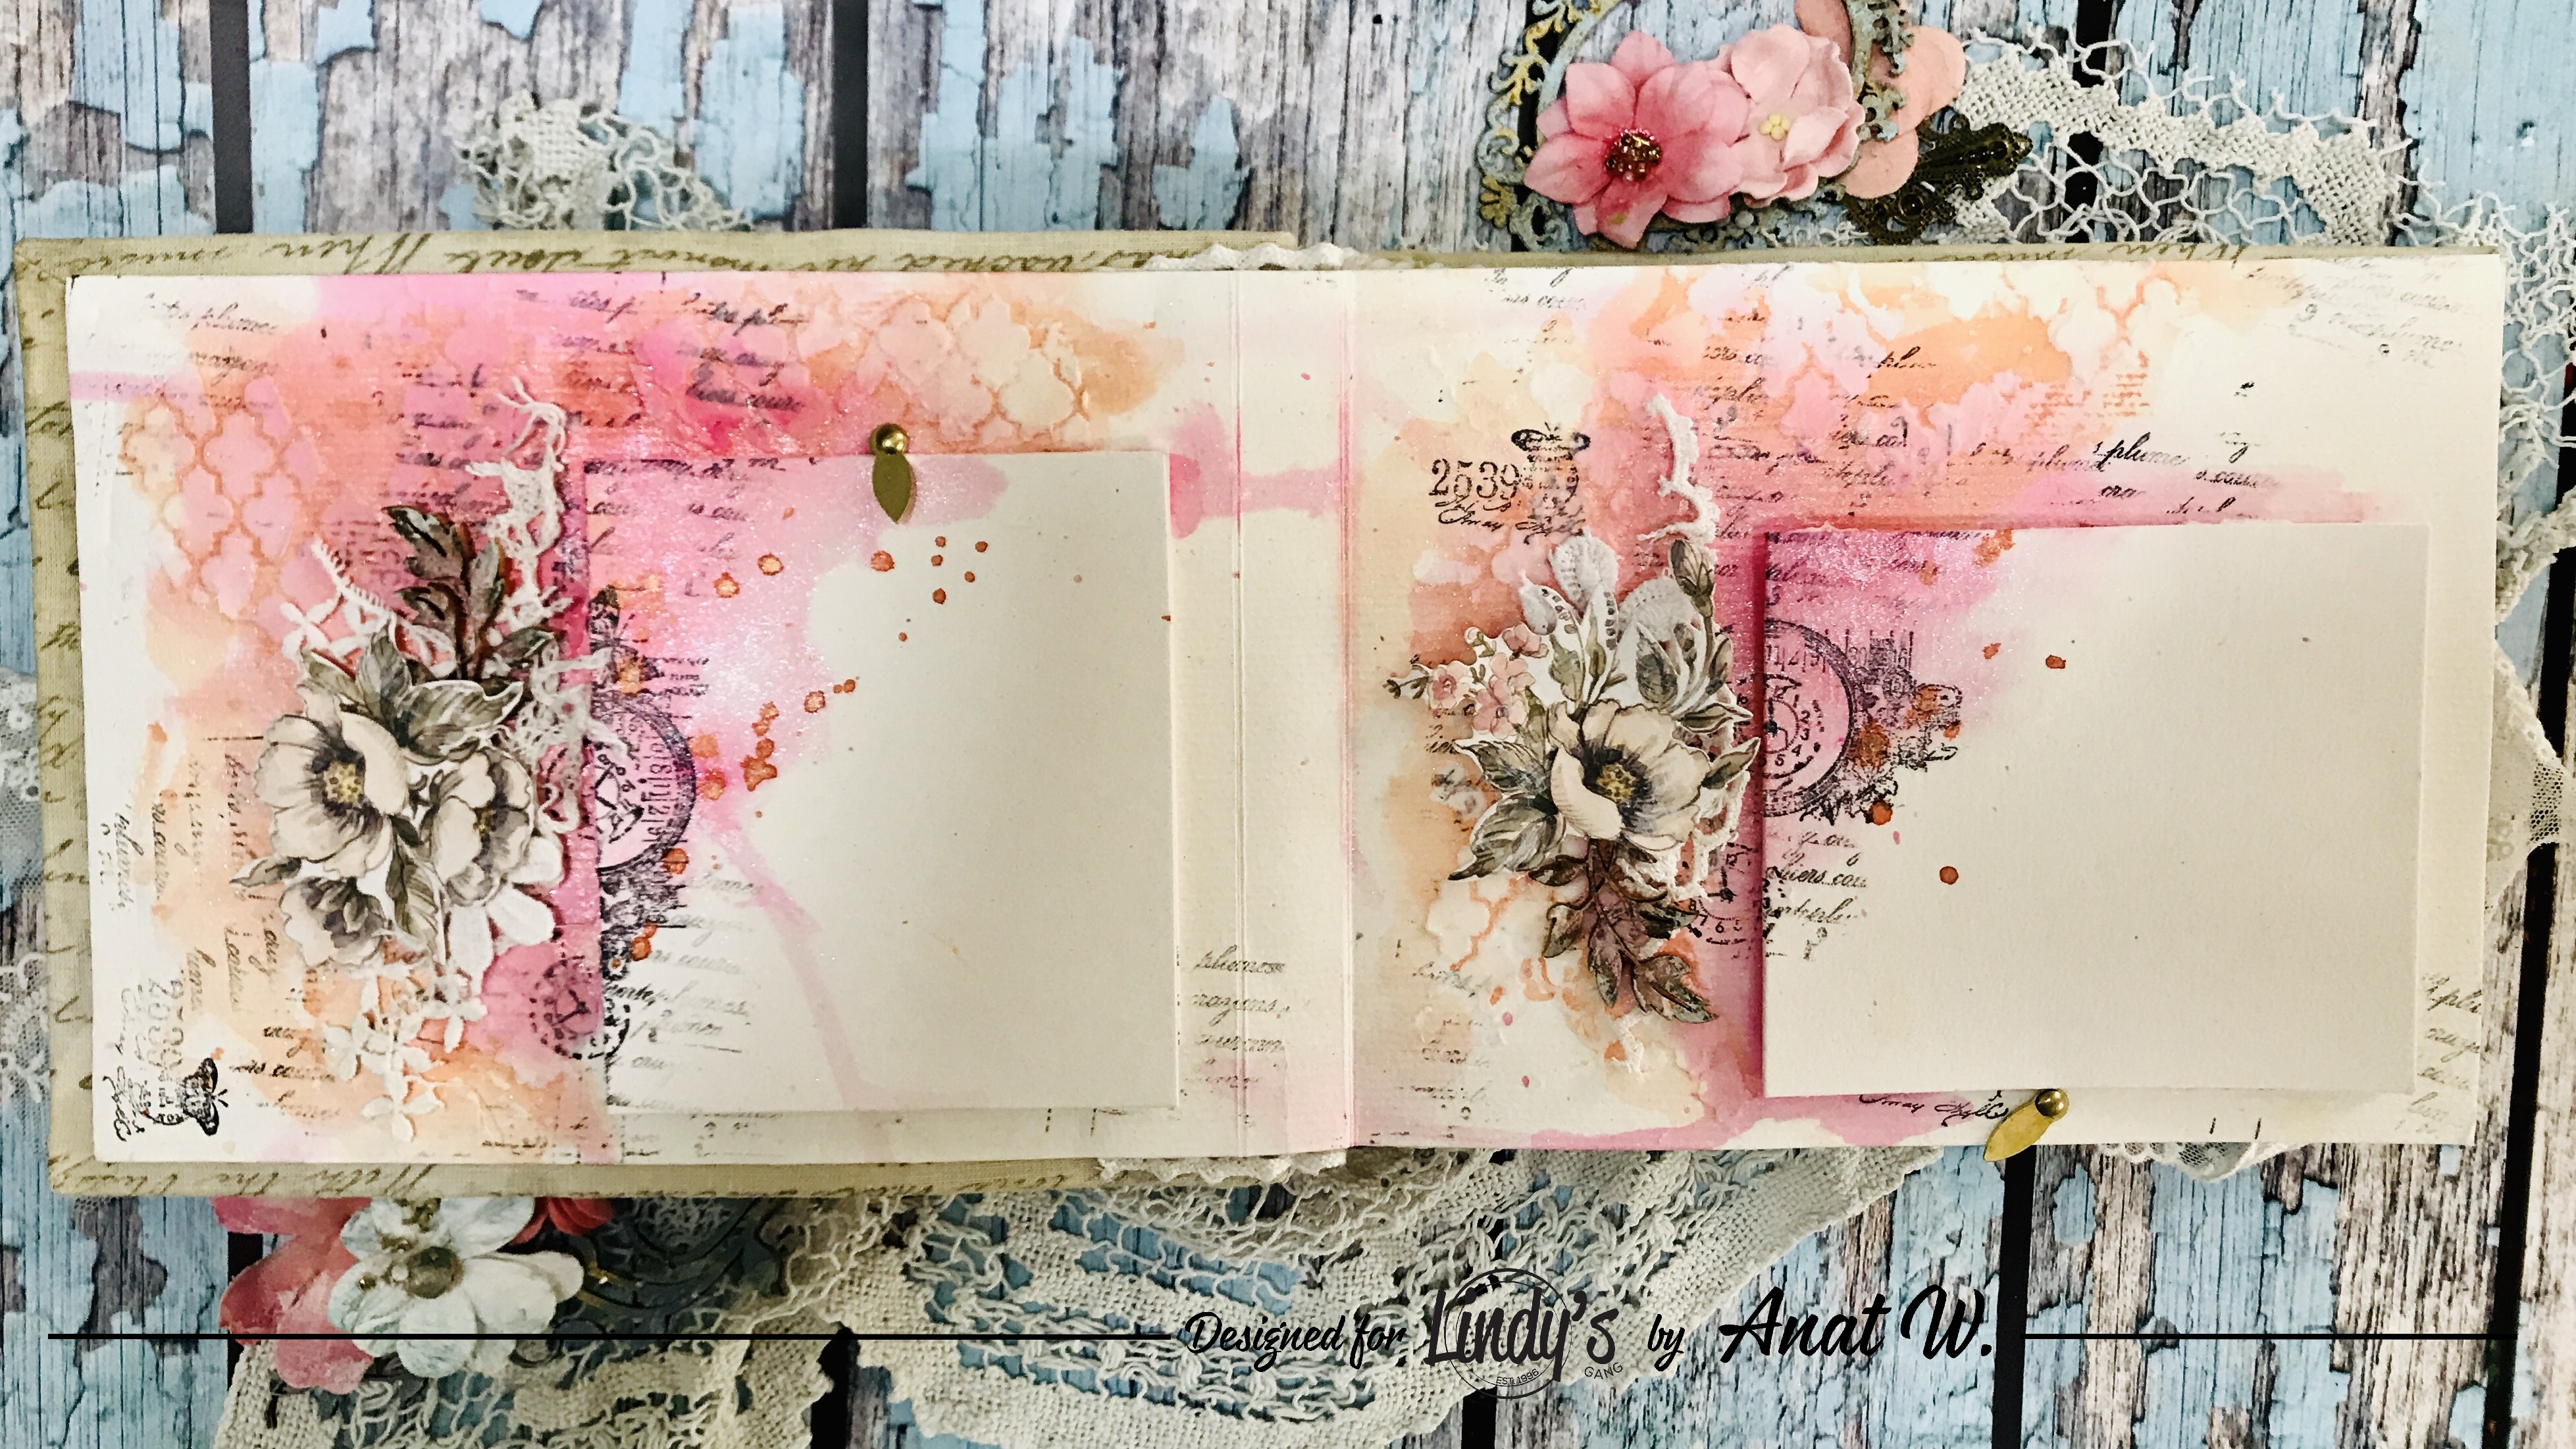
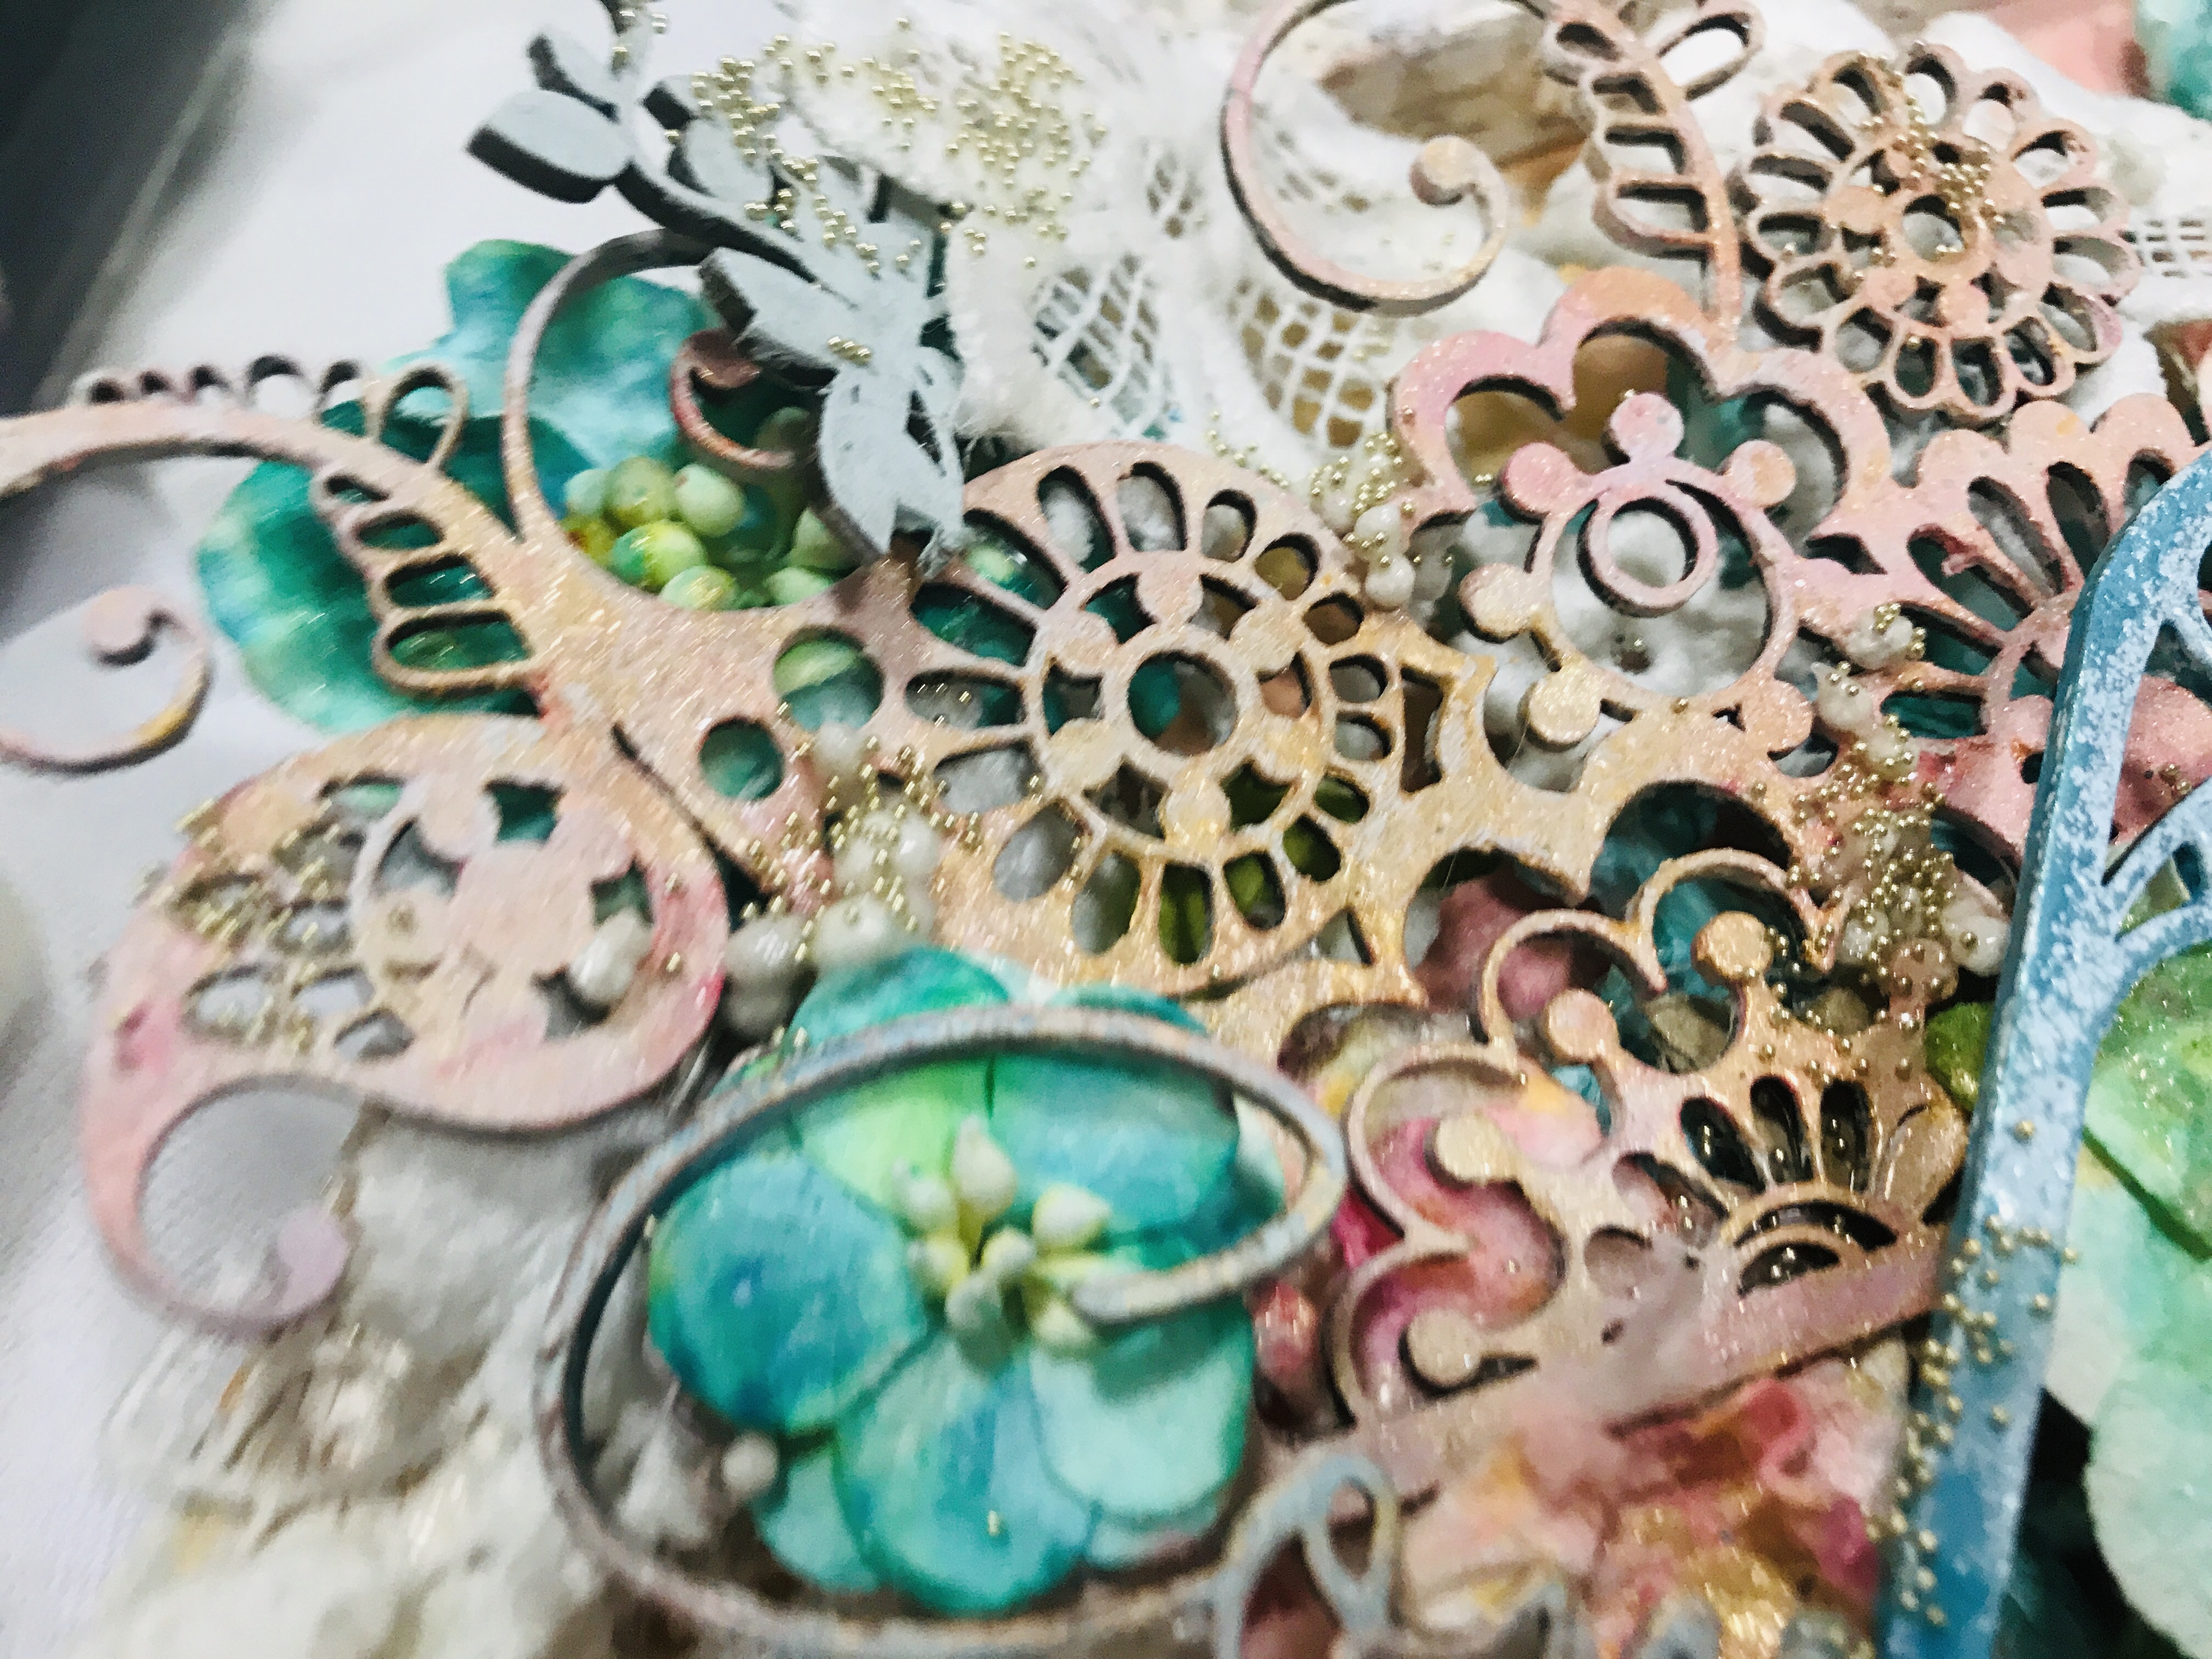
  • I have picked some Dusty Attic's Chipboards and primed them with White Heavy Gesso
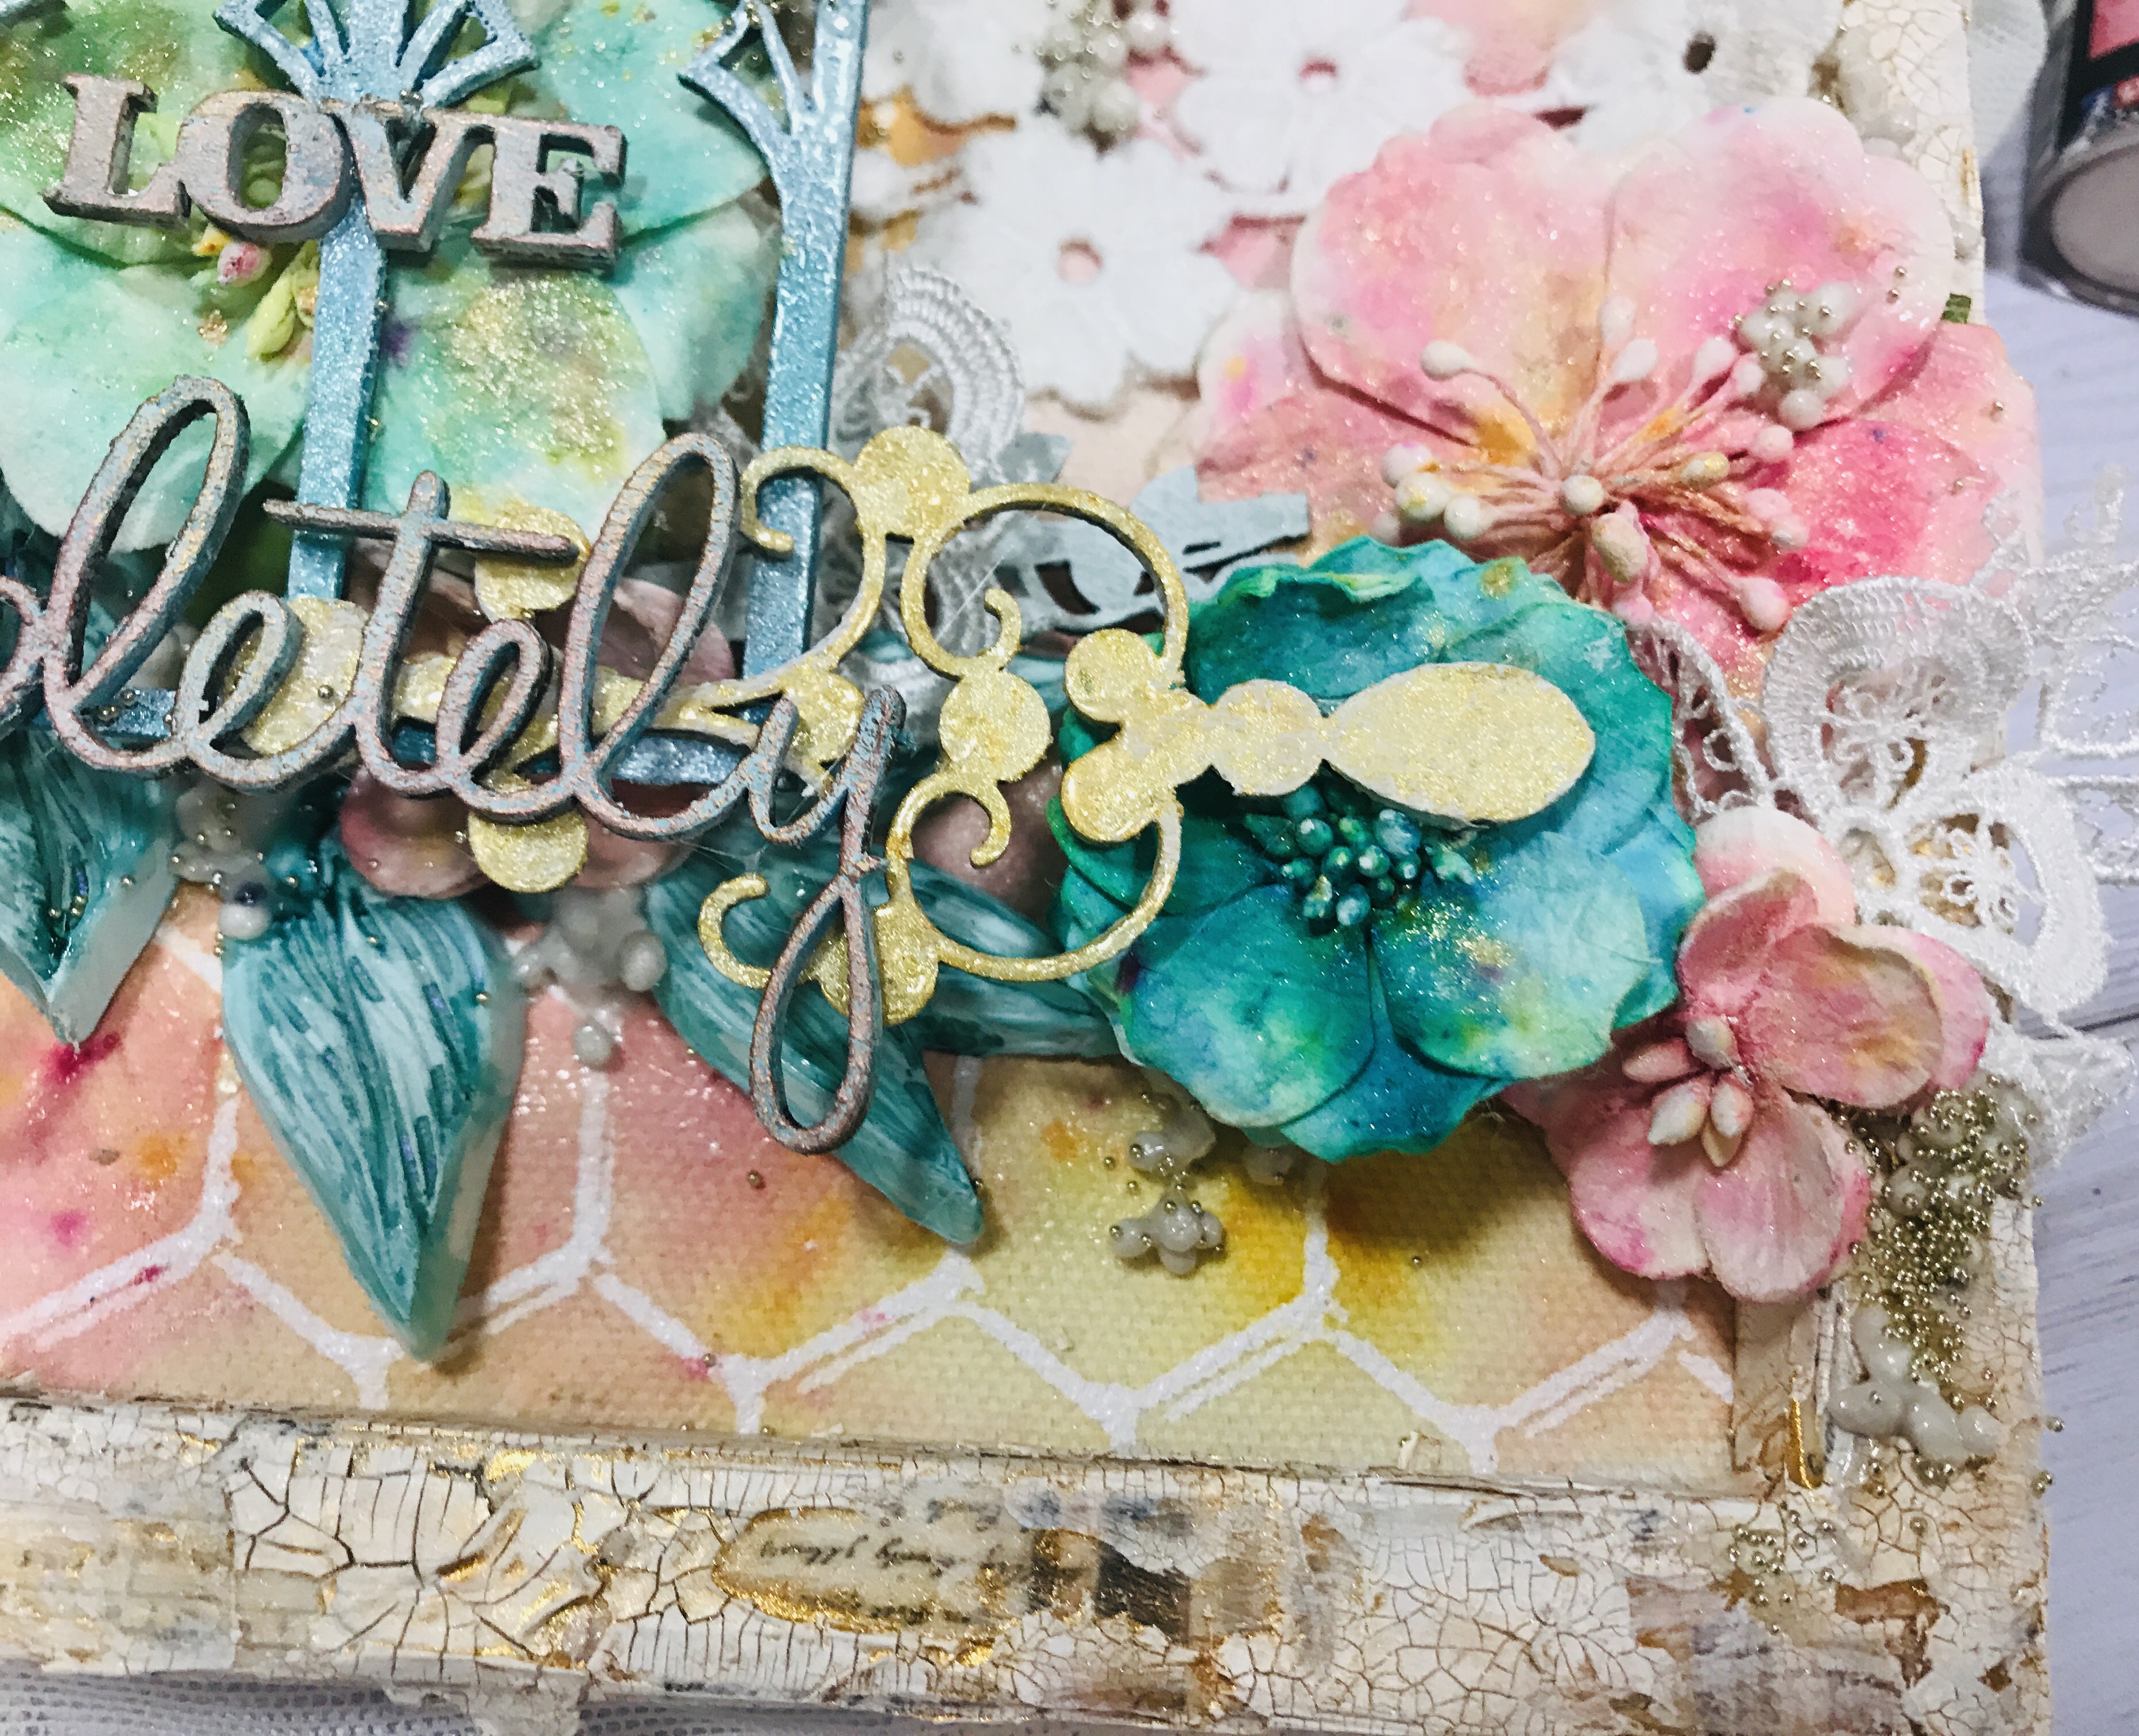
  • To color the chippies I used Lindy's Shakers, starting with: Alpine Ice Rose
    tip: To get Shabby-Pastel colors, I sprayed on top Lindy's Sidewalk Chalk Spray, instead of water. Next I used the Amazing Glittering Gold Shaker. On the Window I used Time Travel Teal  Shaker.
  • I decided to add some texture on the chipboards for that I'm using Lindy's embossing powders.
    tip: I’m using Versamark pen because I don't to cover all chipboard
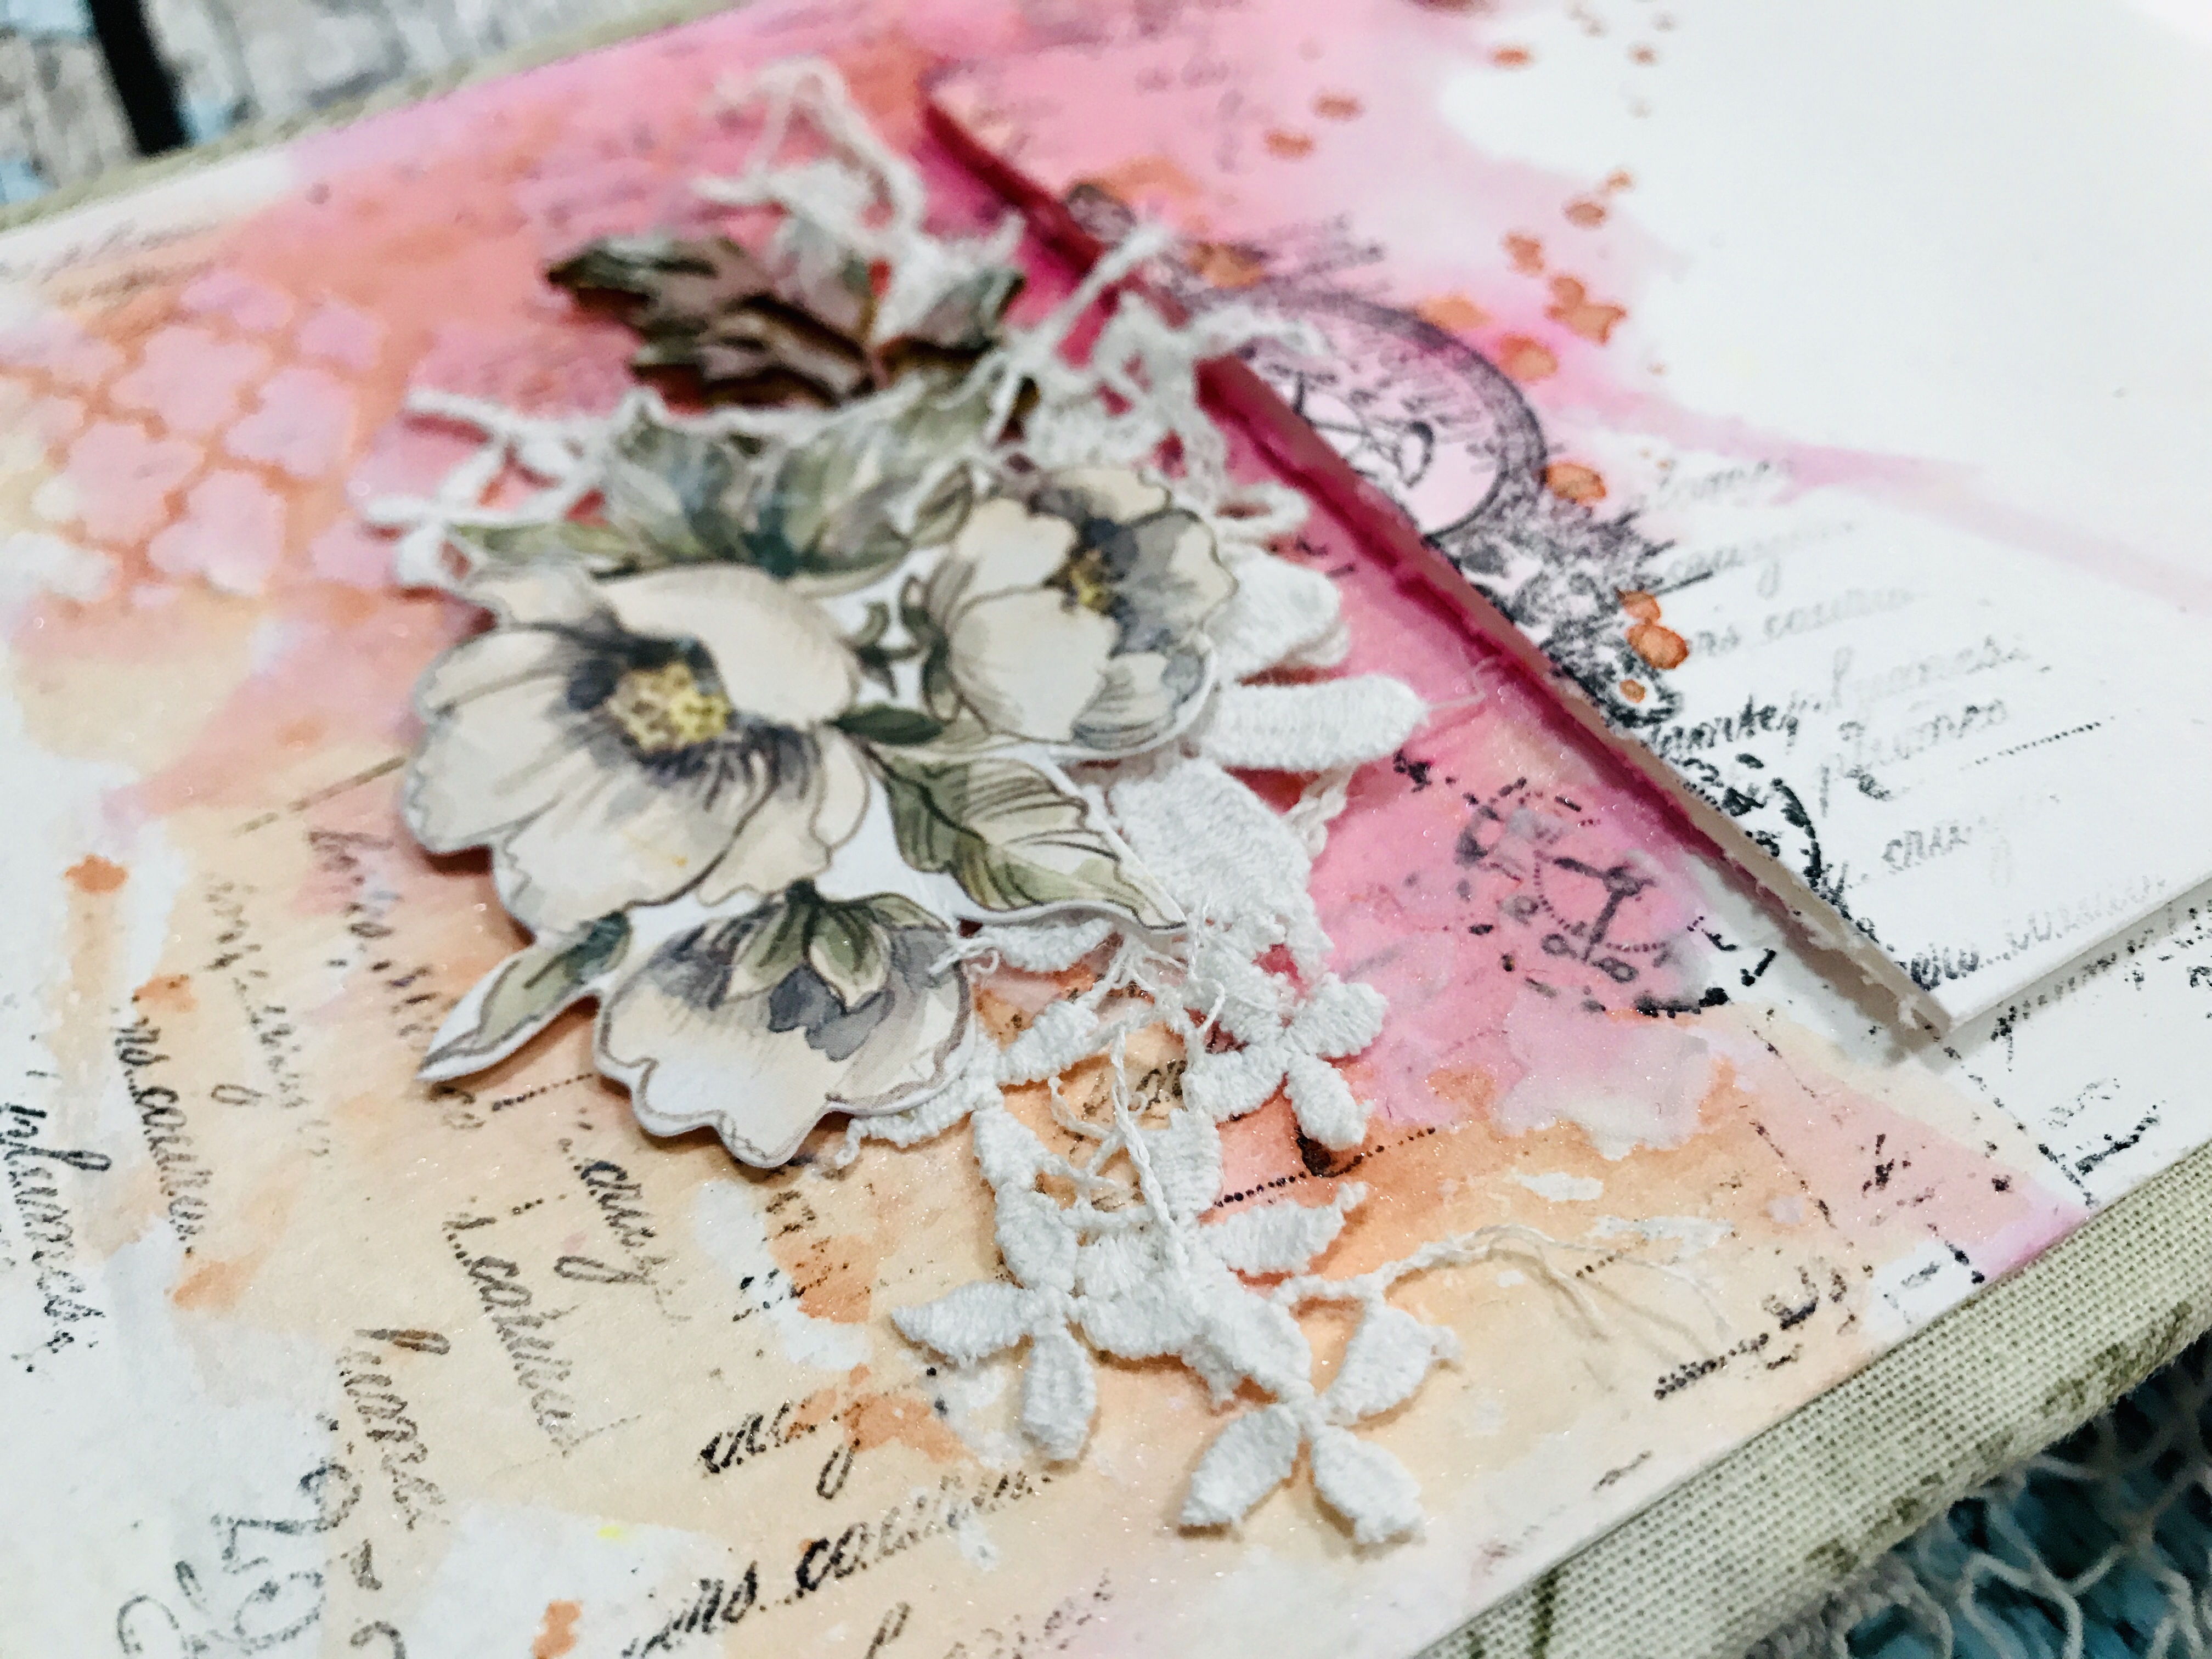
    First I used Starbright Gold Green Lindy's EP, and next C'est la Vie Cerise Lindy's EP
  • Instead of using colored flowers I grabbed white paper flowers and dyed them with the same shakers I used previously: Oom Pah pah Pink, Glittering Gold, Guten Tag Teal
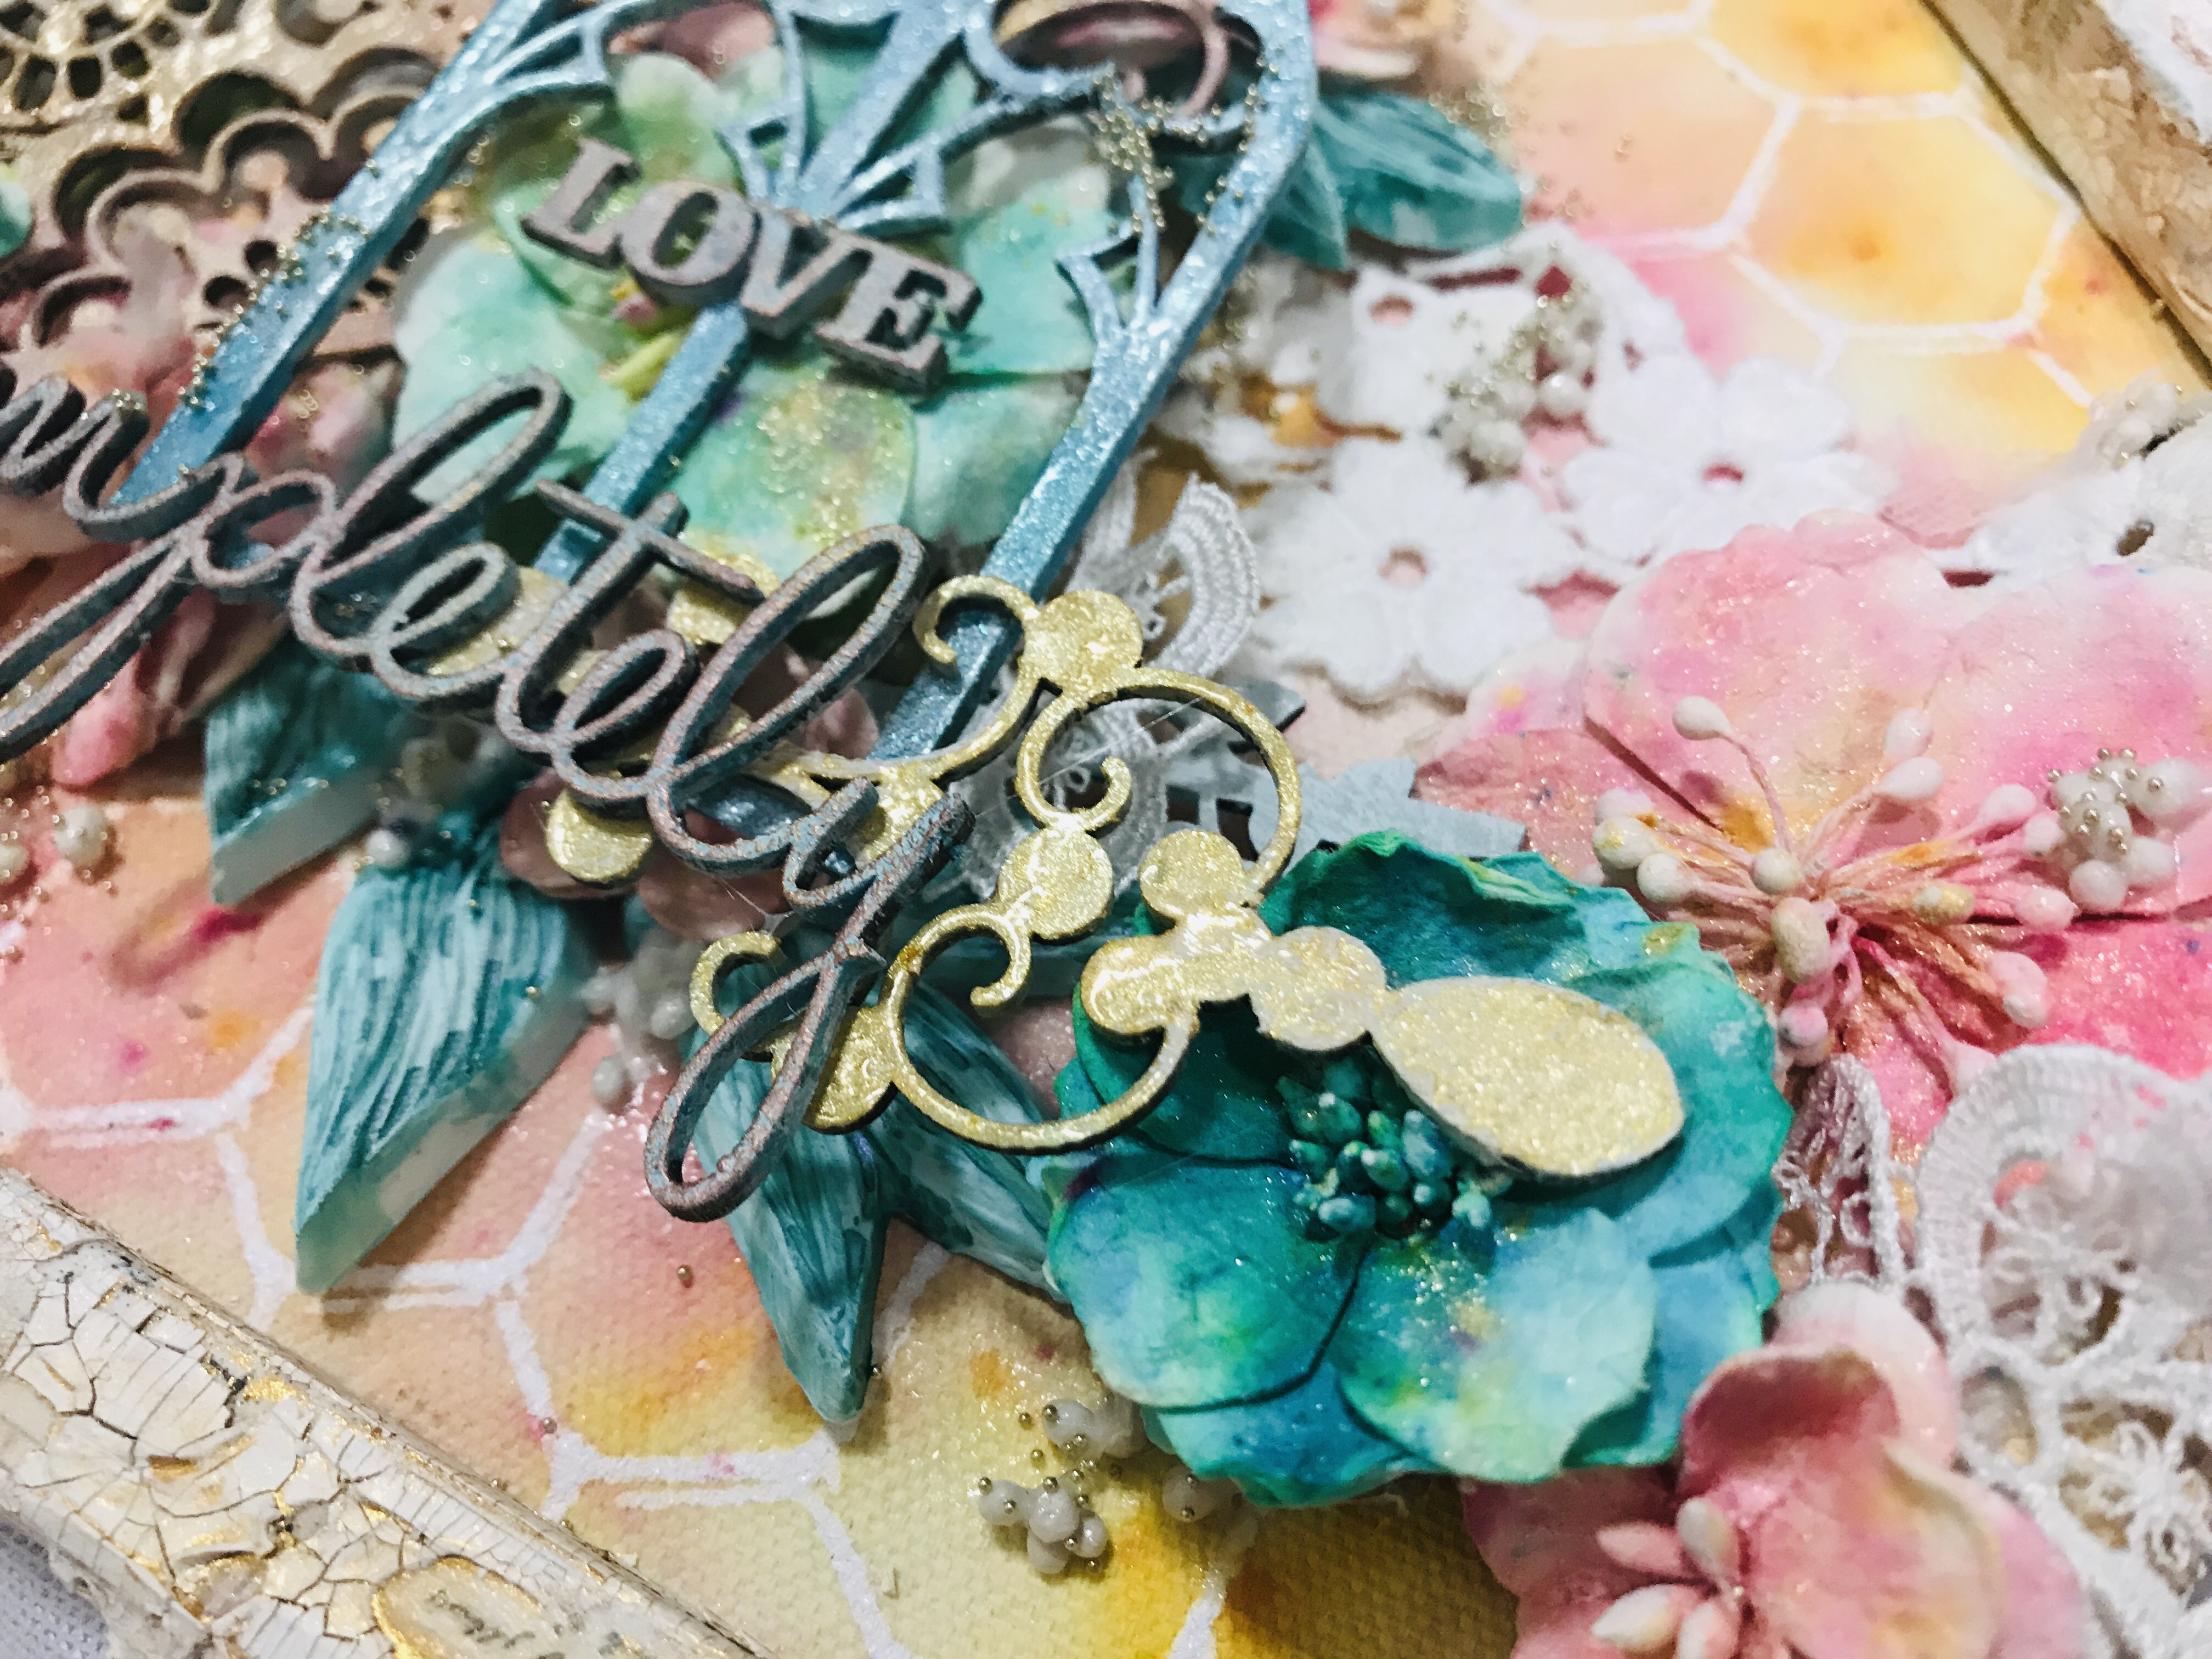
    Here again I spray Lindy's Sidewalk Chalk, to soften the colors
  • Another embellishment to be colored are the resin mould pieces. I mix a bit of White Heavy Gesso with Lindy's Loonie Toonie Teal Squirt
    tip: As the Squirts are thick but still liquid they are perfect for this purpose
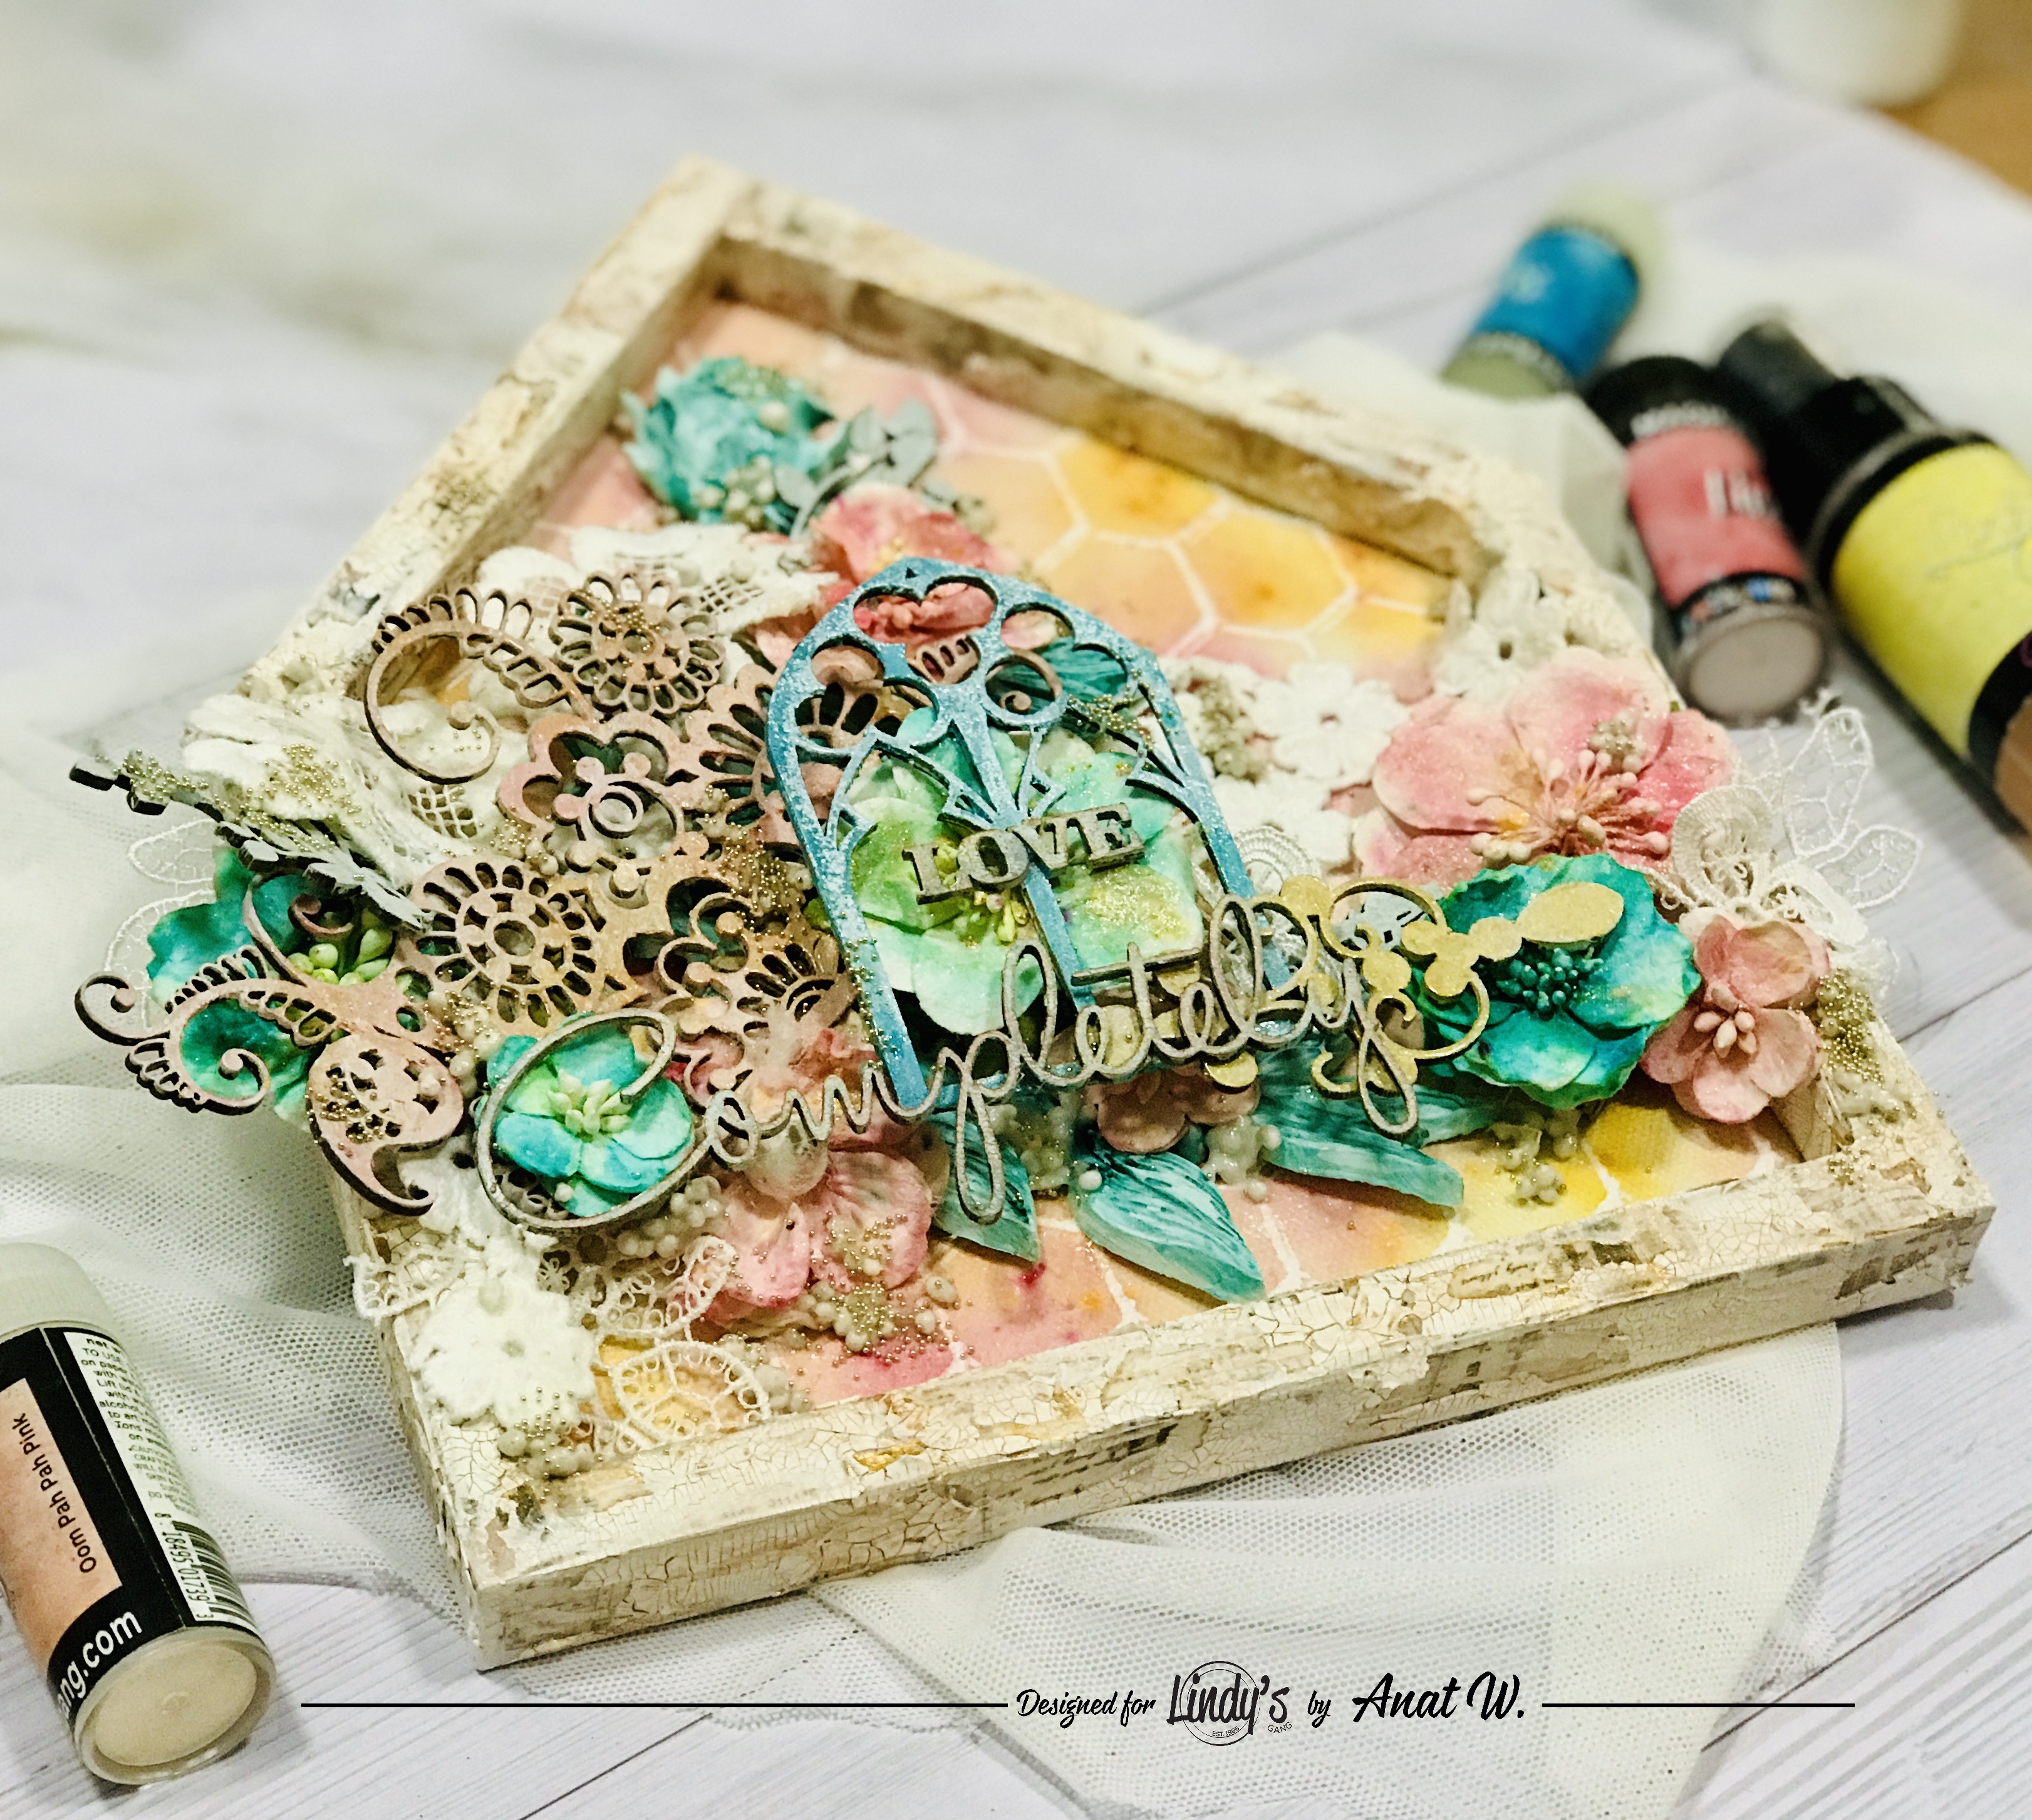
    Dry and add on top a bit of the same Squirt, to get a two-tuned pieces
  • Now it is time to put everything together
I made a video tutorial so you can watch every step of the creation process:


Here are some close-ups, where you can see all the Fabulous shimmer and more details:


Lindy’s Products

Other products
  • Dusty Attic Chipboards, Finnabair-Prima Soft Gel,  Finnabair-Prima White Heavy Gesso,  Finnabair-Prima White Crackle Paste, Finnabair-Prima  Art Stones and Micro Beads, Prima mould
Thanks for stopping by!
xoxo

Oct 9, 2019

Stay Curious Canvas - video Tutorial


It’s Anat here and for today’s blog post, I’m sharing a new Video Tutorial showing how to create a Canvas Background, alter Metal elements with different effects  and more, using Squirts, Shakers, Sprays and Lindy’s Embossing Powder.


Basic Steps

  1. First step is to add to the canvas Plaster texture paste  with a Stencil
  2. When dry cover with white heavy gesso
  3. Add White Crackle Paste and wait for crackling
  4. When the crackle is dry, add color starting with the lighter color which is Bling-y Blonde Spray, second Emerald Eh? Squirt, continue with Loonie Toonie Teal Squirt and at last add the stunning Hockey Puck Black squirt
  5. Color, an already stamped, water color paper with Whale Watch Blue magical and assemble
  6. Color mould prints with Bling-y Blonde Spray and the others with Whale Watch Blue Spray, add metalique waxes to highlight details
  7. Cover chipboard elements with Embossing Powders: on background pieces use Queen Sheba's Silver, on swirls use Scotch Broom Yellow and on the clock swirl Guten tag teal.
  8. Assemble everything on the canvas
  9. Add to the canvas a bit of Steampunk Sepia Spray diluated in water
  10. Add stamping with Black Archival Ink
  11. Add to the composition metal elements and some more clay embellhiments and color them with a mixture of 3D Gloss gel and Guten Tag Teal Shaker. You will notice a different effect on each kind of embellishments.
    Add waxes to them.
  12. Add some more beauty with Glass Glitter and Micro Beads
  13. Give it a try and have fun:)
Have a look at the Hockey Puck Black squirt effect, it is so fabolous!


Watch the step by step video here:


Here are some more pictures and close-ups:


Lindy’s Products

Other products
  • Finnabair-Prima Plaster Paste,Prima Stencil, Finnabair-Prima White Crackle paste, Prima Moulds, Finnabair-Prima Srerling Glass Glitter, Finnabair-Prima Microbeads, Finnabair-Prima 3D Gloss gel, Prima-Finnabair Soft Gloss Gel, Finnabair-Prima waxes, watercolor paper , Tim Holtz Stamps,  Prima-Finnabair Old City Stamps, Archival Ink- Jet Black, metal elements, chipboards
Thanks for Stopping by!
xoxo

Jun 24, 2019

Creating Album pages with Lindy's

Hello best gang!
It's Anat here and for today's post I'm bringing you a new Video Tutorial showing how to create Album pages with Lindy's Starburst and Vintage Sprays and Lindy's Magicals.


Oh my! I enjoyed so much creating this mini Album! so join me!

Basic Steps

  1. I previously prepared 4 spreads from a 300g watercolor paper and 8 flips for the photos. Attach the flips to the spreads 2 in each one. Try to place them in opposite sides so they support each other,
  2. With the help of a paintbrush, spatula and water spray add color to the pages using gorgeous Cotton Candy Pink, TiffanyLou Blue, Mad Hatter Mint Green and Cape Cod Coral Magicals
  3. Add stamping with Black Archival Ink, each spread different stamps (see below what I used).
  4. Add texture to all spreads with Light Paste and Stencil
  5. Add a second color to each spread – Opal Sea Oat, Whale Watch Blue, Yellow Rose of Texas, Fuzzy Navel Peach Sprays.
  6. For the Album cover, take another 300g paper, cut it in 4 pieces and repeat on every piece the 1-5 steps. (Each one with different colors). When dry cut them as you like for the Album cover decoration.
  7. Color chipboard embellishments with Burnt Umber, Screamin' Banshee Black, Golden Doubloons, Ethereal Emerald Vintage Sprays
  8. Add to the chipboards - Cotton Candy Pink, Cape Cod Coral, Glory of the Seas Magicals
  9. Add White Gesso dry brush on the Embellishments, in all 4 spreads.
  10. Give it a try and have fun:)
The Video Tutorial is a bit longer than my usual but I needed to show you all the magic that happens while creating with Lindy's.

Watch the proces here:


Here are so MANY photos from all possible angles LOL...


Lindy’s Products

Other products
  • 300g watercolor paper, Finnabair-Prima Light Paste, Finnabair-Prima White Heavy Gesso, Prima "Rossibelle" Stamps, Prima "Zella Teal" Stamps, Carabelle "Collage Texte et Negatife" Stamps,  Archival Ink- Jet Black, TWC "Mini Quatrefoil" Stencil
Thanks for Stopping by!
xoxo